Tag Archives: seafood

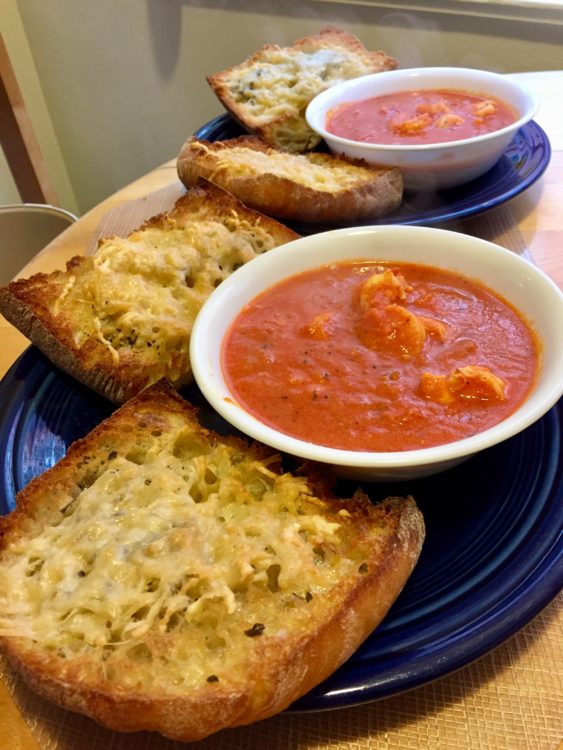
Arrabiata sauce with garlic-cheese bread for dipping

Bowls of arrabiata sauce with large slabs of garlic-cheese bread on the side

The son and husband units wanted pasta and sauce. I didn’t want to cook pasta. So, a happy medium, courtesy of the slab o’ciabatta my Mom left for me, which was screaming to be turned into garlic bread.

I also happened to have a quart of frozen marinara and two pounds of fresh 21/25 shrimp on standby. They’d make a good sauce, thought I, particularly with a hit of heat and some extra umami.

It’s easy to turn any basic tomato sauce into spicy arrabiata via a couple of smashed anchovies, some pureed garlic and a decent quantity of red pepper flakes. Just simmer the whole business together for about 10 minutes.

Why do I say pureed garlic? Well, sir, it happens I do quite a bit of Indian cooking and have taken a major liking to jarred garlic paste, which is nice and mellow. No bitterness. This is especially helpful in a recipe where the garlic isn’t cooked long enough to lose its harshness. Pick up a high-quality brand from India at your local Indian grocery and then tell me what you think. I go through this stuff like wildfire. It’s a lifesaver.

This dish calls for quite a bit of garlic. Just saying. If you want to use fresh cloves, please do, but make sure you’ve broken them down to a super-smooth consistency.

Trader Joe’s arrabiata is respectable, by the way. Rao’s marinara is exceptional, but it’s dear. Pick it up when it’s on sale. It’ll still set you back upwards of $6 or $7 a quart, but when you arrabitize it — wow!

Add a salad and you’ll have a fine dinner. However, if you overcook the shrimp you will not have a fine dinner, so please don’t.

Arrabiata Sauce with Shrimp and Garlic-Cheese Bread for Dipping
 
Prep time
Cook time
Total time
 
Individual bowls of this spicy, flavorful sauce chock full of shrimp and a side of garlic-cheese bread make for a comforting meal.
Author:
Recipe type: main
Cuisine: Italian
Serves: 3 - 4 servings
Ingredients
  • 1 quart hot arrabiata sauce (or marinara sauce simmered for 10 mins with a tablespoon of pureed garlic, a squeeze of anchovy paste or a crushed anchovy fillet or two, and at least a teaspoon of red pepper flakes)
  • Two pounds deveined and shelled shrimp, no smaller than 21/25 (squeeze the tails off, too)
  • Olive or sunflower oil for sauteing
  • Three tablespoons garlic puree
  • ½ teaspoon dried oregano
  • Pinch or more of salt
  • One ciabatta loaf, cut in half lengthwise and then each half cut into four slices. You should wind up with eight flat trenchers
  • ½ cup good olive oil into which you have mixed two tablespoons of garlic puree, a little dried oregano and a bit of salt
  • ½ cup freshly grated or shredded parmesan cheese
Method
  1. Preheat oven to 375 F.
  2. Arrange bread slices on a sheet pan and brush olive oil mixture onto each
  3. Distribute cheese evenly onto bread slices
  4. Place bread in oven so it heats while you deal with the rest of the recipe
  5. Add olive or sunflower oil to a large saute pan and heat over medium flame until it's hot but not too hot, and then add shrimp
  6. Saute for about a minute, turn the flame down slightly and add the garlic, oregano and salt
  7. Saute until shrimp are just underdone, making sure the flame is low enough to keep the garlic from browning
  8. Add the hot arrabiata sauce to the shrimp, stir, put the lid on and turn off the burner
  9. Check bread. If tops are not slightly golden brown, turn oven up to broil or high convection for a minute or so. Don't burn the bread!
  10. Serve the sauce immediately in individual bowls with garlic-cheese bread on the side


Your Basic Fried Oyster Po’boy with Slaw

I admit to craving oysters every now and then.  I would have been happy in turn-of-the-century New York City, I think, where oysters were plentiful and every dive sold oyster stew.

I often see an oyster po’boy—or poor boy, if you want to get fancy—in my mind’s eye as I’m driving or doing laundry.  I never know when a strong desire for fried oysters will strike.

The bread in my po’boy fantasy is always an Acme sourdough roll.  The oysters are always large, plump and juicy — and there are so many of them they are falling out of the sandwich.  The breading on these fried pillows of bliss is a little crunchy and has some spice, but not enough to mask that hint of metallic funkiness.  There are slices of the tomatoes I had as a child – huge, red, ripe Beefsteaks from roadside stands in New Jersey and Pennsylvania.  A little cabbage slaw barely dressed in a sweet-sour dressing peeks out, and there might even be a little remoulade, if I’m getting really unhinged.

As you can see, to me, a po’boy is made with fried oysters.  Period.  Even though this Louisiana sandwich is perfectly authentic made with other kinds of fried seafood, or even meat, I figure I can have those things any old time.  Fried oysters make it special.

Believe it or not, it’s the bread that defines a po’boy.  Apparently there is such a thing as Louisiana French bread – something like a baguette – with a flaky exterior and a soft interior.  Perhaps this is like banh mi  – a Vietnamese baguette.  I’ve never had a po’boy in its native habitat, so I don’t know, but I have some time yet.

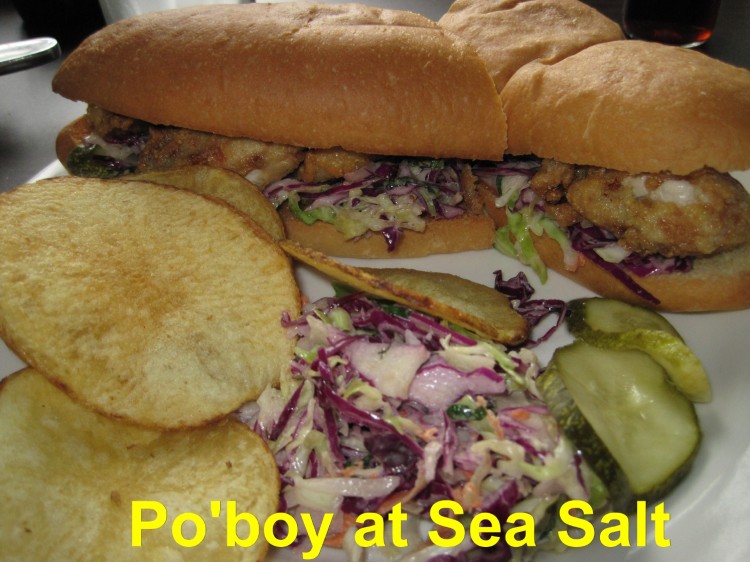
Matthew at Sea Salt restaurant in Berkeley

Matthew at Sea Salt restaurant in Berkeley

The long and short of this story involves Matthew, my son, and myself driving down San Pablo Avenue one day deciding to pop in to Sea Salt (2512 San Pablo Avenue, Berkeley) for a po’boy pour moi and fish and chips for his nibs.

Sea Salt is a solid seafood restaurant.  I like the fact that they preserve the authenticity of standards like fish and chips and clam chowder.  God knows there are enough places in Northern Cali where these things have been deconstructed and reinvented to death.

It ain’t cheap, being an upscale member of the K2 family of eating establishments, which includes Jimmy Beans, Fonda, T-Rex and LaLime’s.

That said, $14 is a small price to pay for your heart’s desire – served in a very nice space with great service, to boot.  My po’boy came on a quality roll with slaw and remoulade, and housed a respectable number of oysters.  Oh, man, the oysters were good.  Not only perfectly cooked, but fresh, given that they were shucking oysters in the kitchen while we were there eating.  The breading had texture and flavor, too.  Suffice it to say that the whole damned sandwich was slammin’.

I have to mention the hand-cut, house-made potato chips.  They were the thickest pototo chips I ever had in a restaurant, and not at all greasy.  Crunchy and salty, they were terrific.

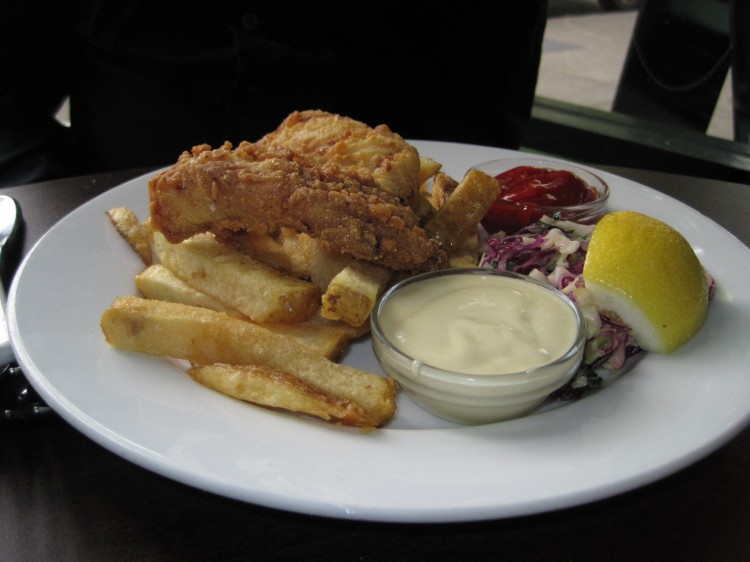
Matt’s $14 fish and chips plate was fine, if a bit skimpy in the fish department, but the quality was there.  The cod was fresh and nicely cooked.  Matt said he’d get the po’boy next time, though.

Fish and Chips at Sea Salt restaurant in Berkeley

Fish and Chips at Sea Salt restaurant in Berkeley

I think you should try your hand at a po’boy at home.  It can be a bit messsy, and it’s easy to overcook oysters, but the result will be worth it – even if you have to try a couple of times before you nail the oyster-frying process.

If you want to shuck your own oysters, great.  I do not.  I buy them from a fishmonger who will shuck them for me, or I’ll pick up a high quality, fresh, jarred oyster.  Look for sustainably-farmed, and ask your fish guy or gal which local oyster they recommend for po’boys.  Make sure you buy oysters at a reputable shop.  The last thing you want is food-borne illness from a shady oyster.

Renate's home-made po'boy

Po’boy at chez akitachow

Basic Po’boy
1 quart medium-sized fresh oysters (medium is nice and large – small is OK if this is all you can find)
3/4 cup flour
1 teaspoon Old Bay seasoning
1 teaspoon Kosher salt
1/2 teaspoon black pepper
1/2 teaspoon ground mustard
1/4 teaspoon cayenne pepper
1 – 1/2 cups panko (coarse bread crumbs)
1 teaspoon Kosher salt
3 eggs, scrambled with 2 tablespoons water
2 large, ripe, tomatoes, sliced or diced.  Use really good tomatoes or leave them out of the recipe!
Canola oil for frying
5 long rolls of some kind.  I like Acme sweet or sour rolls.  Use good rolls here!
If you have a large, cast-iron frying pan, this would be a good time to haul it out

1).  Whisk together flour, Old Bay, salt, black pepper, ground mustard and cayenne pepper in medium-sized bowl.  Set aside.
2).  Combine panko and salt in medium-sized bowl.  Set aside.
3).  Carefully – very carefully! – pour your oysters into a bowl.  No need to rinse them – just feel around gently for stray shell pieces.  I do this by catching each oyster as it transitions from jar to bowl.
4).  Arrange your breading station:  oysters, flour, egg mixture, panko mixture, receiving plate.
5).  Set up a large, heavy-guage, frying pan with about a 1/2 inch of Canola oil on your burner – but don’t turn on the flame yet.
6).  Set out a small sheet pan lined with paper towels to place fried oysters on, as well as long tongs.
7).  Set out your plates – place a split roll on each and have your slaw on stand-by.
8).  Bread oysters like so:  Add four oysters to your flour mix, allowing juices to drain through your fingers first.  Toss gently.  Move with dry hand into egg mixture, and coat evenly.  Move to panko, toss gently to coat, and move with dry hand to plate.  It’s hard to do the ‘wet hand, dry hand’ thing here, but see if you can keep one hand dry to move coated oysters around.
9).  When you are all ready, turn on a medium flame under your frying pan and let the oil get hot.  Toss in a couple crumbs of panko to see if there’s a sizzle.
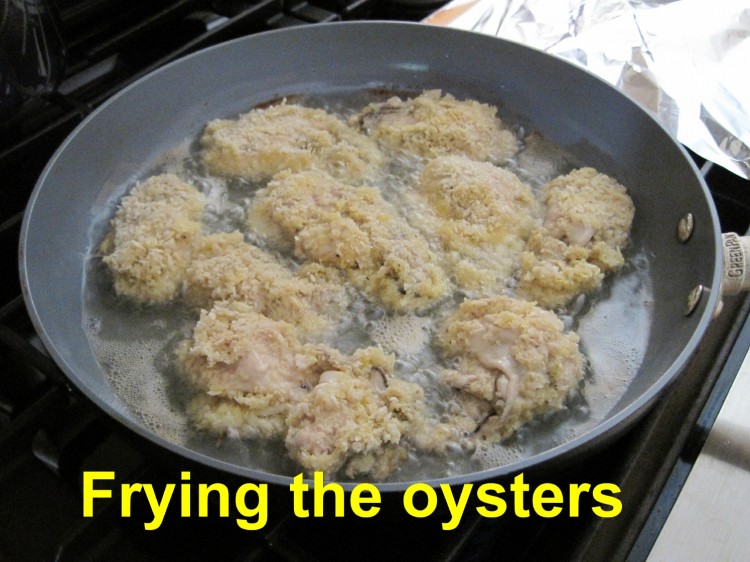
10). Gently add oysters (carefully, by hand, because they will be floppy) so you do not crowd them and thus wind up bringing the temperature of the oil down.  You want them to sizzle but not burn.
11).  Once they have browned a bit, turn them over gently with the tongs and let them quickly brown on the other side.
12).  Get them out of the pan and onto your sheet pan as soon as you’ve done this.  If you overcook them, they will shrink and become rubbery.  They do not need more than a few minutes over the heat.
13).  Bring oil back up to proper heat (add a little more oil if you need to) and repeat with remaining oysters.
14).  As soon as your last oyster hits the sheet pan, prep the rolls for the oysters.
15).  Arrange tomato slices in each roll and then heap a nice mound of slaw on top.
16).  Add 4 – 5 oysters on top and serve right away with lots of napkins!  I put the oysters on top of the wet stuff so they don’t get soggy.

Slaw for Po’boys
   Makes enough for about 5 large sandwiches
2 1/2 tablespoons white vinegar
2 tablespoons sugar
1/4 cup good mayonnaise (see my post on this)
1/2 teaspoon Dijon mustard
A little salt & pepper
1 pound shredded cabbage or cole slaw mix

1).  Whisk everything but the cabbage together in a bowl until the sugar is dissolved.
2).  Fold in cabbage well.
3).  Leave on counter for an hour, folding the mass together every so often.
4).  Place in fridge until ready to use.

If you want to serve a remoulade*, there are many recipes on the web, but you can’t go wrong mixing a little chili oil, white pepper and salt into some good mayo.

*A remoulade is often something like thousand island dressing, but it can also be akin to tartar sauce, depending upon the recipe.

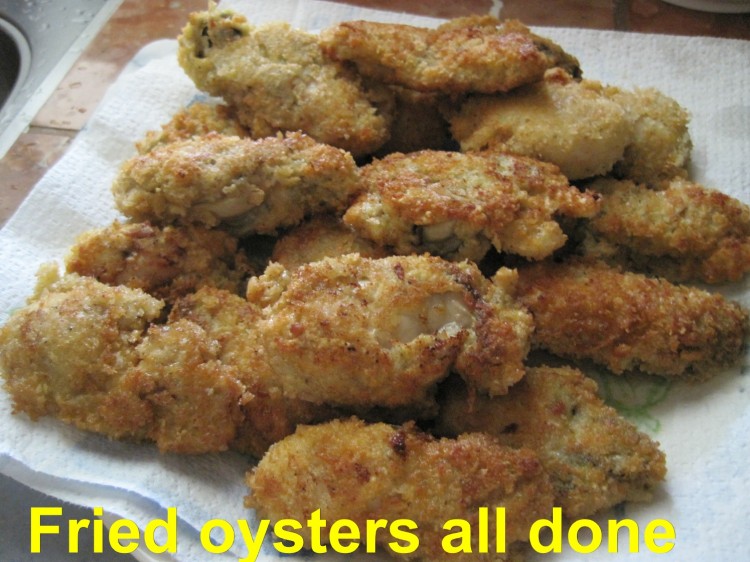
frying oysters for po'boys  Plate of fried oysters to be used for po'boys

Make gravlax at home – it’s easy!

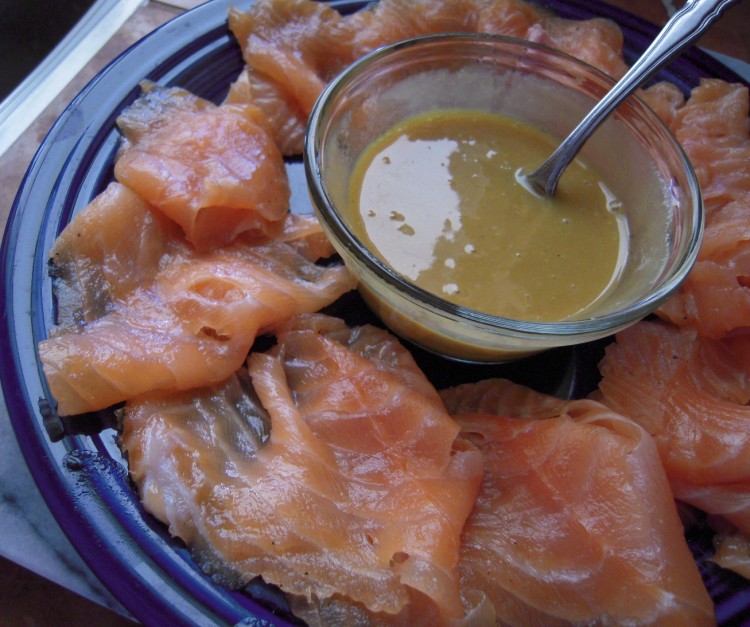
Plate of sliced gravlax

Although I enjoy cooking in all its forms, I do have my niche – as all cooks do.

What made me love garde manger, which means, loosely, “guard of the pantry,” and involves the cold kitchen, I’ll never really know, but my Northern European roots are probably to blame.  I was fed smoked and cured proteins pretty much from birth, and knew a high-quality aspic well before Kindergarten.

When you find yourself daydreaming about the cross-hatching and radish roses on the chopped liver at the appetizing counter at Waldbaum’s during 4th grade geography, you know you have issues.  When you’re planning Christmas Eve hors d’oeuvres and it involves a trip to Fortunoff for a fondue set when you haven’t yet reached your full height, well, I think you have to face facts.

If you’re not in the cooking trade, you may not know what “the cold kitchen” is.  It’s cures, molds, terrines, pates, galantines, confits, sausages, smoked meat and fish products, salads, decorative flourishes, ice and food sculptures and cold soups and sauces.  The part that inolves all the work with pork falls under charcuterie.

While chef de garde manger is now often referred to as an entry-level cooking position – it involves the salad station and small plate prep, requiring limited experience – a true garde manger is a highly-skilled chef in a specialty with gravitas.  This profession dates back to pre-revolutionary France and is considered seriously old-school.  In high-end kitchens, this is the position responsible for numerous classical dishes and presentations.

Garde manger has evolved over the years to accommodate changing tastes, eating patterns and lifestyles.  I think most cooking school graduates will make one chaud froid for every 10,000 sides of smoked salmon they produce during their careers – unless they’re banquet chefs!

While certain things that fall under this genre are best learned in a formal cooking class,  there are some that are quite easy to make at home – but most people don’t know that.

Today I want to pass along to you my simplified recipe for gravlax, aka gravad lax, which is dill-scented cured salmon served with a mustard sauce.  Often an appetizer, it’s great as a full summer meal served with crispbread, like Wasa, and a big salad.

Gravlax is akin to lox, which is cold-smoked, in its silky smoothness and rich mouthfeel.  It looks like lox and is sliced thinly in the same manner.  Gravlax is not exposed to any heat, however, rather just cured in a salt and sugar mix.

It’s expensive and not that easy to find.  If you want to have it out, go to Ikea.  Buy a whole package of their crispbread before you go into the cafeteria, then get several gravlax plates.  You can feed 3 or 4 people gravlax this way for under $20.  This is a serious bargain.  I tell you to get the package of crispbread in advance so you don’t have to pay the per-piece price for extra in the cafeteria – which, at something like 35 cents per piece, is the only insanely-priced item in the whole store!

No need to have it out, though.  You can make it at home a couple of days before you need it.

If you want to use my traditional gravlax method, look here, but I needed to find a way to minimize the amount of refrigerator real estate I used to prep this, having been downsized from a double-wide unit recently.  Long story involving a lemon of an LG that my appliance store, Galvin, took back after two years.  It looked nice, had a bottom freezer and French doors, but the ice maker was wreaking havoc.  In exchange, I got a GE with a side freezer.  The ice maker on this one is a problem, too.  Don’t even get me started with ice makers.  I never had one.  Never wanted one.  Was convinced to get one.  Had nothing but problems since then.  Ice is all over my freezer – again.  I get ice and frost on the floor when I pull out the ice bin.  Why?  It does not stop making ice.  Ever.

Back to the fish.

A few key pieces of information:

1).  Buy fatty salmon.  Your gravlax will not work with salmon that is lean.  You have been warned.  If you can’t get wild, fatty, king/chinook salmon, buy a sustainably farmed version – of some kind of fatty salmon.  Keta salmon, which is all over the Bay Area as I write this, is too lean.  Steelhead salmons – which are actually sea-faring rainbow trout, believe it or not (or, I should say, rainbow trout are salmon that never leave home) – have a medium fat content and are OK.

2).  Buy a boneless side of salmon with the skin.  Or a piece of a boneless side with the skin.  Ask your fishmonger if the pin bones have been removed.  If not, ask that they be removed.  If you need to remove them, look here.

3).  Buy good fish from a market like Monterey Fish – or Berkeley Bowl’s fish counter.  The fish will be fresh, and these people care about sustainability.  Do not buy crappy salmon from a supermarket in a package with all kinds of goo.  You know exactly what I mean.

4).  Work clean.  You should always do this, but take extra care when you cure or preserve something.

Honestly, gravlax alone  justifies my two years of culinary school given how often I make it.

Gravlax with Mustard-Dill Sauce

1 side of salmon with high (or at least medium) fat content with no pin bones (see above)
1 lemon (a fresh lemon!!!)
1 ounce plain vodka, gin or aquavit
1/2 cup Kosher salt
1/2 cup raw sugar
2 tablespoons ground black pepper
1 large bunch of dill, washed and absolutely dry.  It must be dry!!  Reserve a small piece of dill for sauce.
Aluminum foil
Paper towels
2 pastry brushes

1).  Make cure mix.  Whisk together salt, sugar and pepper.  Set aside.
2).  On counter, lay out a double thickness of foil that is about 6 inches longer than your side of salmon.
3).  Fold about 6 paper towels in half and create a bed that is about the size of the salmon.
4).  Lay side of salmon, skin side down, on the paper towel bed.
5).  Squeeze the lemon over the flesh, and then brush it onto the entire surface.
6).  Brush the booze onto the entire surface with the other brush.
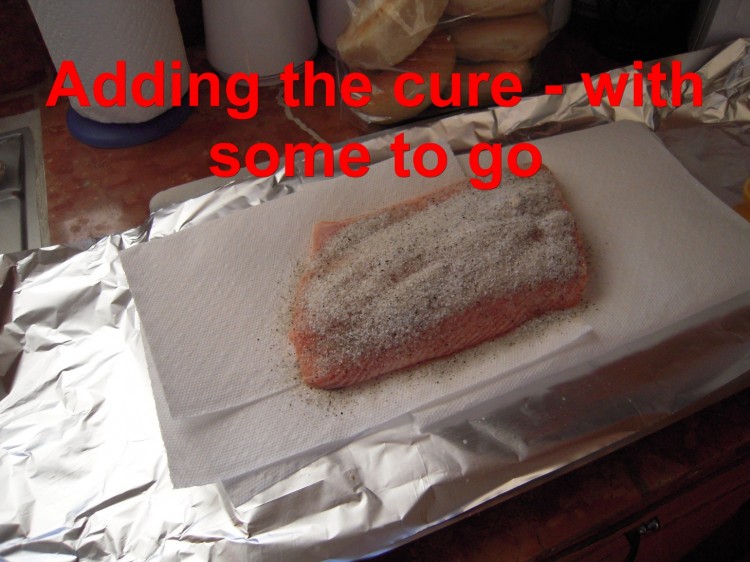
7).  Sprinkle the cure mix over the fish, making sure you cover the entire flesh, applying it more thickly to thicker parts.  Don’t touch or rub it in.  Use all the mix.
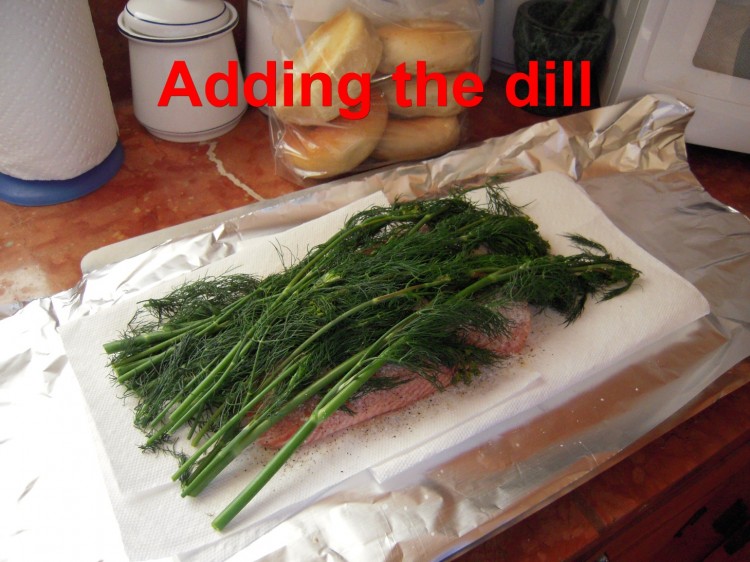
8).  Cut a couple of inches of stem off the dill and arrange the rest on top of the cure mix without disturbing it.
9).  Fold ends of foil over, then sides.  Cover the top with another large piece of foil.  You want to wind up with a rectangular foil-covered package.  Keep fish perfectly flat at all times and do not bend fish!!!
10).  Lay fish packet flat in back of fridge on a few paper towels or another piece of foil – just in case there is a little seepage.  Sometimes there is, sometimes there isn’t.
11).  Allow to cure for two days.  Three days is OK if you have a very thick fillet.
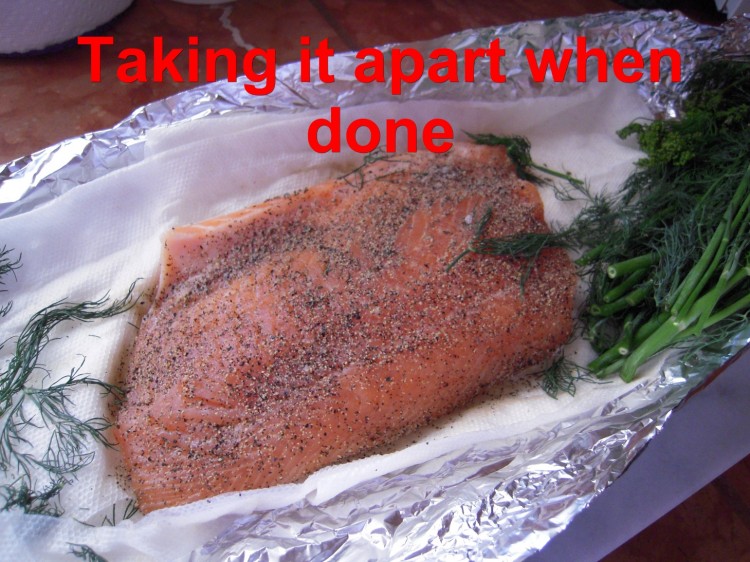
12).  Remove from fridge, open packet and move fillet to a cutting board that has a couple of paper towels on it.  Discard dill.  If cure does not come off easily, it’s OK to quickly rinse fish under cold water and then gently pat dry, bottom and top.
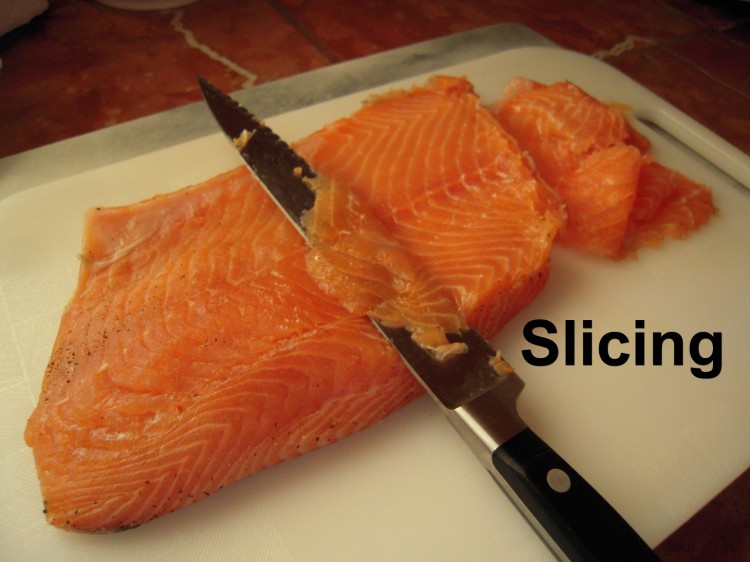
13.  Using a clean cutting board and a sharp, thin knife, cut long, thin slices, holding knife almost parallel to the fish.  See photo.  This takes some practice, but you’ll get the hang of it.  I use a serrated knife – even though a serrated knife is generally not the tool for this job, but it works very well because it’s so thin and holds a razor-sharp edge.  A slicer, if you have one, may be your best bet.  A good boning knife, too.  Depends upon you and the knife.
14.  Arrange slices in lovely circular pattern and serve with a cup of cold mustard-dill sauce in the center.

Mustard-Dill Sauce
Whisk 1/2 cup Dijon mustard, 1/2 cup good honey, a little chopped dill (remember that you were supposed to save a little?), and a couple dashes of sea salt and ground white pepper.  Allow to sit in fridge for a couple of hours so flavors meld.  Note that there’s no dill in the sauce in the photo because someone threw out my reserved dill.
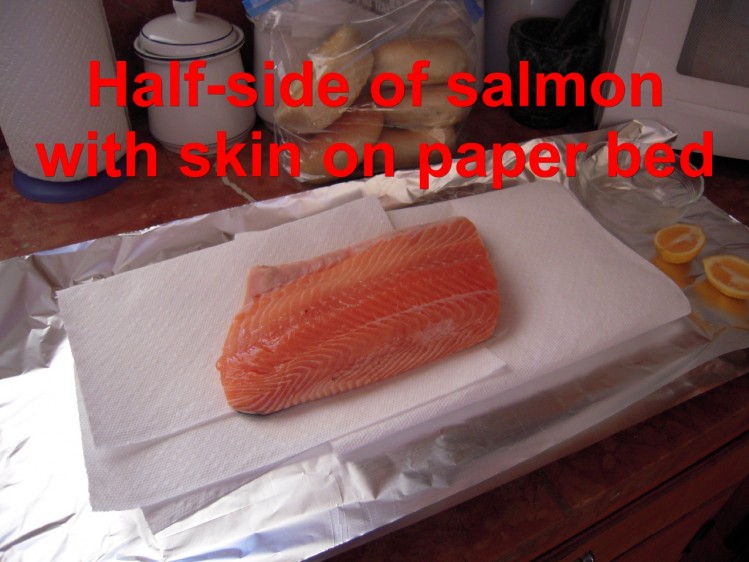
Piece of salmon ready to be made into gravlax

gravlax with cure sprinkled on

gravlax with cure and dill ready for fridge

Gravlax foil packet ready to go into fridge

slicing gravlax

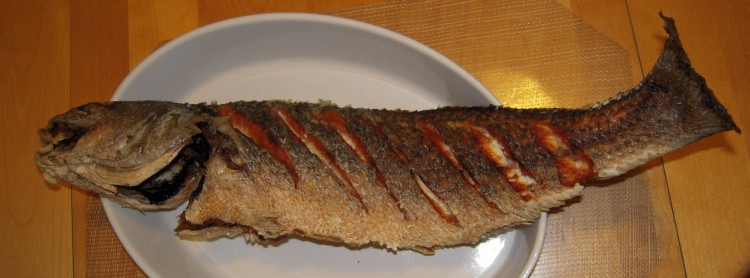
Crispy fried red drum

red drum 2010

Red drum, also known as redfish and spottail bass, was on sale at 99 Ranch Market in Richmond today, so I ordered one in the #6 style, which means cleaned and then fried crispy.  They do all of that extra stuff for free at 99 Ranch, which is helpful.  You can eat your fish as-is when you get home, or cut it into steaks for recipes that require frying before braising.

I usually peruse all the fish and then buy what’s on sale or looks interesting.  Today, at $2.99 a pound, the red drum seemed like the way to go.  They all had clear eyes and smelled good.

These bottom feeders were overfished during the 70’s and 80’s, the latter period no doubt the result of Paul Prudhomme’s blackened redfish, which was all the rage for a few years.  Found mainly off the coast in the Atlantic and Gulf of Mexico – which explains their popularity down South – they’re mild and flaky if caught small (under 15 pounds).

Apparently they can live to 60 years and reach 90 pounds.

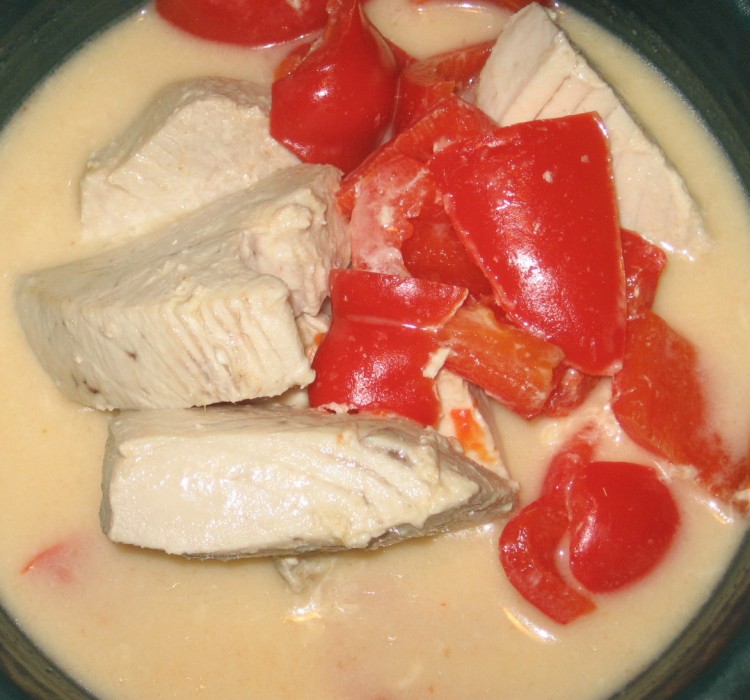
Tom Kha Tuna

tom kha tuna 2010

I had quite a few frozen albacore tuna steaks in my freezer that I needed to use up, which is the only reason I would use such a protein for this dish – let’s get that straight up front.  Why?  If you overcook fresh tuna, you may as well use canned, and it would be very easy to overcook it in this dish.  Albacore and ahi steaks are best seared and served on the rare side.  However, if you find yourself with some that have been hanging around in the freezer till their drop-dead usage date and you want to cook them through, you may want to try this recipe.  If not, use another kind of meaty, white-fleshed fish, shrimp, scallops, or chicken.

This recipe uses tom kha paste. Even people who spend way too much time dealing with food don’t always want to grind lemongrass and galangal, so Thai curry pastes are a Godsend.  That said, tom kha pastes tend to have too much salt and lack the brightness you’d have in a homemade version.  To get around that, we add a few fresh ingredients to amp it back up.  Generally speaking, this problem is less pronounced with other pastes, like panang, green and masuman, to name a few, than it is with the tom kha, which I always need to doctor up.

This is usually offered as soup in Thai restaurants, i.e., Tom Kha Gai (chicken), but I serve it with rice as a full meal.
This recipe will provide dinner to 6 – 8 people if you make a pot of jasmine rice to go with it.  Serve in large bowls and then mound rice on one side.

Tom Kha Whatever-you-like 

2 – 14 oz. cans coconut milk
28 oz chicken stock
1/4 cup tom kha paste (buy in Asian markets)
1 stalk lemongrass, peeled of outer leaves, cut into short (2″) sticks, using the bottom 2/3 of stalk only
2 large slices of fresh galangal or standard ginger – no need to peel
6 red bell peppers, in large chunks (they add some smokiness, but feel free to use some green and some red)
3 1/2 lbs. firm, white protein, i.e., chicken, in large cubes
1/8 cup fresh lime juice

1).  In wok or large cooking vessel and over medium heat, whisk coconut milk, stock (fill each empty coconut milk can with stock to measure) and tom kha paste until blended.
2).  Add lemongrass and galangal.
3).  Bring to boil and add the peppers.
4).  Bring to simmer and cook for 2 minutes.
5).  Bring to boil over high heat and add protein, stir in, bring to simmer, lower heat and cook until protein is just done.  If using something like albacore, this would be only a couple of minutes.  For chicken or shrimp, generally no more than 4 or 5 minutes.  Depends also on the size of your cuts.
6).  Turn off heat and stir in lime juice.
7).  Taste and add a little more lime juice, if needed.
8).  Ladle into bowls.  A couple of scallion curls on top would be nice, or cilantro sprigs.