Monthly Archives: March 2010

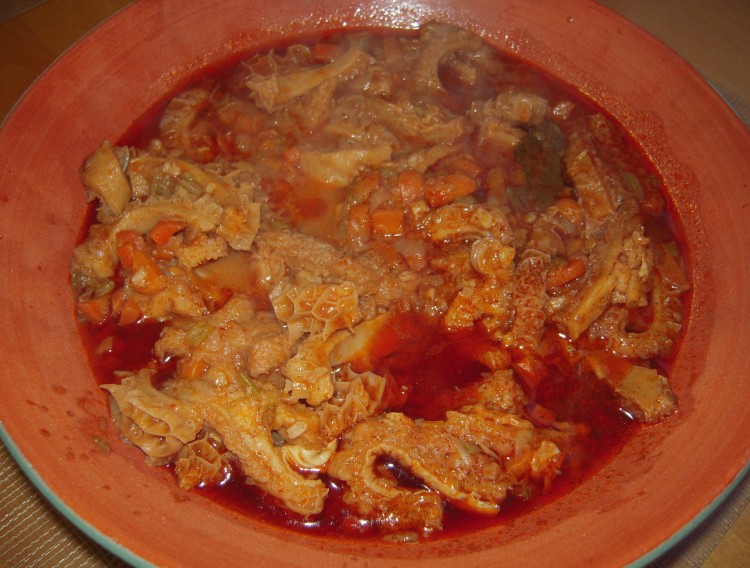
Your basic tripe stew

Tripe stew in the Polish tradition - red from the paprika!

Tripe stew in the Polish tradition – red from the paprika!

We love tripe.  My Mom is from Germany, and her family ate everything edible on an animal, and passed that principle down to me.

I often have tripe at dimsum, and it’s a real treat.  It’s usually served two ways.  Honeycomb tripe (from the second stomach structure of a cow) is stewed with turnips in sauce, rendering it soft and savory.  Book tripe, from the third stomach structure (I say this because cows technically don’t have four stomachs), is steamed with scallions and ginger and served with a light dipping sauce.  Try one or both when you go for dimsum just to see if you can deal with the texture, which is the issue for most Americans.

I make it at home once every few years.  It’s readily available at Asian markets, like 99 Ranch, and pretty easy to deal with, since most of the tripe sold nowadays has been thoroughly cleaned and blanched.

For the recipe that follows, use honeycomb tripe, which has little honeycomb indentations on one side.  Don’t use book tripe, which is the other one commonly sold.  Book (aka leaf) tripe has thin strips on one side, and does not work as well in a stew.

This is more or less a Polish recipe, but I’ve futzed with it over the years.

Serve with a soft starch, if you like, but I want textural contrast, so I eat it with a crispy baguette.

Renate’s Tripe Stew
     serves 6, if you have sides and/or plenty of bread

2 1/2 pounds honeycomb tripe
3 tablespoons Canola oil
1 rib celery, de-stringed/small dice
1 large carrot, small dice
1 yellow onion, finely chopped
4 cloves garlic, finely chopped
1/3 cup tomato paste
2 – 3 cups chicken stock
2 teaspoons sweet paprika
1 teaspoon ground marjoram
Salt & pepper

1).  Rinse tripe and scrub well with Kosher salt on both sides.  Rinse several times.  Cut into 1/2 inch strips that are 3 – 4 inches long.  Boil strips  for 40 mins.  Drain well and set aside.
2).  Saute celery, carrot, onion and garlic in oil in heavy gauge pot until soft and golden brown.  Do not allow to brown too much or to burn!
3).  Add tomato paste and fry in vegetables for about a minute.
4).  Add tripe and saute for about 5 minutes.
5).  Add paprika and marjoram and a little salt and pepper; salt is dependent upon saltiness of stock used.
6).  Add stock until ingredients are covered, but not swimming.
7).  Combine well, cover and allow to simmer for 1 1/4 hours.
8).  Remove cover and allow to simmer an additional 15 minutes.  If too dry, add a little more stock.
9).  Check for tenderness.  If not soft enough for you, cover and cook another 10 – 15 minutes.
10).  Adjust seasoning and enjoy!

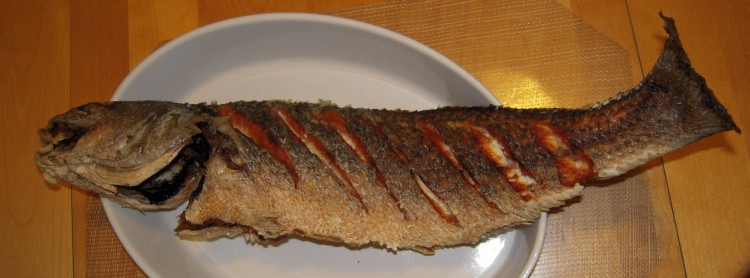
Crispy fried red drum

red drum 2010

Red drum, also known as redfish and spottail bass, was on sale at 99 Ranch Market in Richmond today, so I ordered one in the #6 style, which means cleaned and then fried crispy.  They do all of that extra stuff for free at 99 Ranch, which is helpful.  You can eat your fish as-is when you get home, or cut it into steaks for recipes that require frying before braising.

I usually peruse all the fish and then buy what’s on sale or looks interesting.  Today, at $2.99 a pound, the red drum seemed like the way to go.  They all had clear eyes and smelled good.

These bottom feeders were overfished during the 70’s and 80’s, the latter period no doubt the result of Paul Prudhomme’s blackened redfish, which was all the rage for a few years.  Found mainly off the coast in the Atlantic and Gulf of Mexico – which explains their popularity down South – they’re mild and flaky if caught small (under 15 pounds).

Apparently they can live to 60 years and reach 90 pounds.

Fried chicken livers – too good to believe

Fried chicken livers

Fried chicken livers

I bought some chicken livers to make chopped liver for my husband – which I do annually, but I thought I’d switch it up and make some fried chicken livers instead.  I had them at a soul food place awhile back, and they were so good I found myself fantasizing about them off and on.

This is one of the easiest things to make.  The only way you can screw them up is by overcooking, so don’t do that.

Fried Chicken Livers
     Serves several people as a snack

1 pound chicken livers, trimmed of connective tissue
1 cup milk
1 cup flour
1 tablespoon salt
Enough Canola oil to deep-fry in whatever heavy and deep pan you are using
Freshly ground pepper

1).  Place milk and trimmed livers in bowl and refrigerate for an hour or two and then allow to sit on counter for 30 minutes before frying.
2).  Start heating your oil.
3).  Whisk together flour and salt in a mixing bowl.
4).  Remove livers from milk with your hands and add to flour/salt mixture and shake around until livers are coated.
5).  When oil is hot (350 deg. F. is good, or when some white bread sizzles), shake excess flour off livers and add to hot oil carefully; do not crowd pan.
6).  Move livers around a bit so they don’t stick together.
7).  Fry until golden brown – should not take more than a couple minutes.
8).  Remove to paper towels to drain excess oil.
9).  Add a couple quick grinds of fresh pepper and enjoy while hot

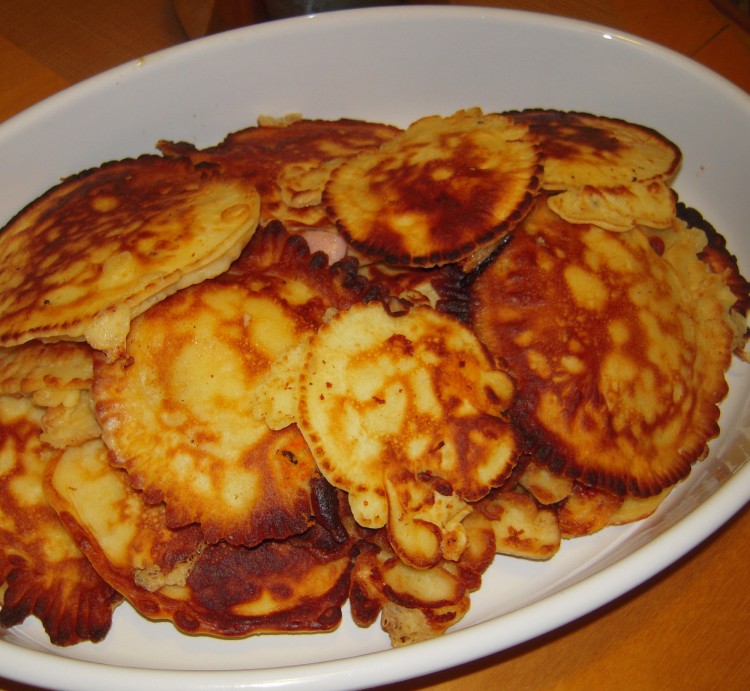
Ham & cheese pancakes for dinner

Hame & cheese pancakes

Han & Cheese Pancakes

When Steve and I were in Amsterdam, we had savory pancakes at a place near the Anne Frank House on the Prinsengracht.  Since that time, I’ve made my own version at home.  I even served them in cooking school as a lunch special, and they were a big hit, being something a little different but highly comforting.

We are not pancake and waffle people, and nothing is worse to me than all those plates you see these days piled high with pancakes, whipped cream, chocolate chips, fruit sauces, nuts and whatever else they load on there.  When I have a pancake I want it with a little butter and real maple syrup, or savory, as I’m covering in this post.

For a basic ham and cheese pancake you need a decent pancake batter.  Any plain version will do, but make sure it’s not sweet.  Feel free to use my recipe, which I’ll provide.

I usually make my pancake batter by feel.  I always have a batch of the dry part of the recipe on hand – like a home-made version of packaged baking mix, but better, because it doesn’t have any garbage, like anti-clumping agents or trans fat – and then I add the liquids of my choice.

To make the dry mix, whisk together:  6 cups all-pupose flour; 7-1/2 teaspoons baking powder; 3 teaspoons salt; 3 tablespoons white sugar.  Make sure you check the expiration date on the baking powder.  Store this in an air-tight container, and make only what you’ll use up in 4 months.

You can make all kinds of pancakes using this dry mix.  My basic pancake is more like a thick crepe, so I tend to produce an eggy batter for that.  I may use buttermilk or yogurt in place of the milk.  It depends what I feel like, but the bottom line is that I use a blend of milk, eggs, fat and the dry mix.

For the savory pancake batter, I use:  1 egg, 1/8 cup of Canola oil and 3/4 cup of milk for every cup of dry mix.  Whisk the egg, oil and milk, and then whisk in the dry mix until you get rid of most of the lumps.  If you want it runnier, add more milk.  Dryer, add more mix.*

Note:  Serve all pancakes, including these, with a little real maple syrup.  Please!  Don’t use the stuff that’s nothing but sugar and high fructose corn syrup, which is most of what’s out there.  Real maple syrup is worth the money.  Finally, please don’t drown good pancakes in syrup.  If you’re doing this there must be something wrong with the pancakes.

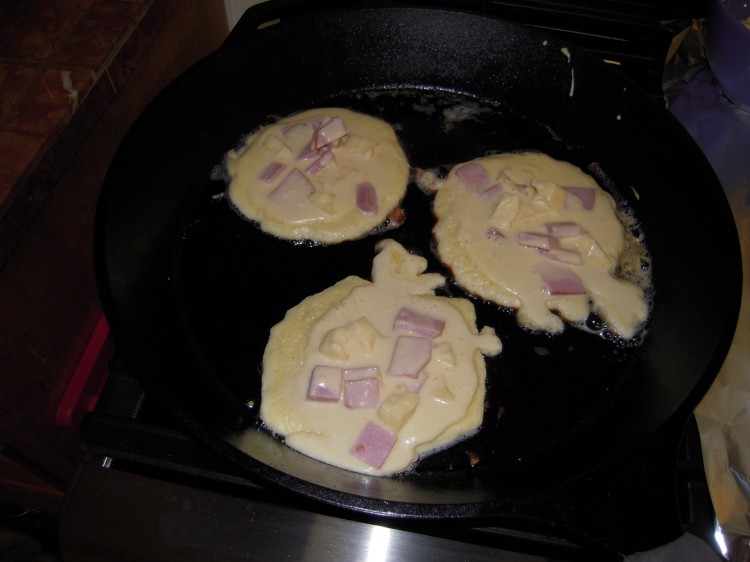
What they should look like after you ladle on the extra batter

What they should look like after you ladle on the extra batter

Ham & Cheese Pancakes
     Serves 2 – 3, or my husband, Steve

*1 batch pancake batter, as indicated above, or equivalent
1 cup sharp Cheddar cheese, in small cubes (more, if you want)
1 cup good cooked ham, in small cubes  (more, if you want)
Canola oil for frying
Cast iron or other heavy pan or stove top griddle (this is important; don’t use a thin pan because the pancakes will burn)
If you are not going to serve them right out of the pan, which is what you should do because they are best this way, you’ll need:
Large, oven-proof dish to hold pancakes
Oven heated to 200 deg. F.

1).  Heat a decent amount of Canola oil in pan over medium heat; turn heat down slightly when oil is hot.  Check heat throughout cooking process.
2).  Ladle batter into pan so you wind up with something like 5-inch pancakes.  Bigger or smaller is OK, too.
3).  Immediately sprinkle some cheese on top of each pancake, and then some ham.
4).  Drizzle a little batter over the ham and cheese – not too much.
5).  When you see bubbles on the surface of the pancakes, turn each over quickly.  The cheese will really melt now and some will ooze out and go crispy in the pan, which is a good thing, but don’t let anything burn.
6).  When pancakes are cooked through, which will not take very long, remove to oven-proof dish and place in oven.
7).  Repeat until you’ve used up your batter.
8).  Serve will a little real maple syrup on the side.