
Although I enjoy cooking in all its forms, I do have my niche – as all cooks do.
What made me love garde manger, which means, loosely, “guard of the pantry,” and involves the cold kitchen, I’ll never really know, but my Northern European roots are probably to blame. I was fed smoked and cured proteins pretty much from birth, and knew a high-quality aspic well before Kindergarten.
When you find yourself daydreaming about the cross-hatching and radish roses on the chopped liver at the appetizing counter at Waldbaum’s during 4th grade geography, you know you have issues. When you’re planning Christmas Eve hors d’oeuvres and it involves a trip to Fortunoff for a fondue set when you haven’t yet reached your full height, well, I think you have to face facts.
If you’re not in the cooking trade, you may not know what “the cold kitchen” is. It’s cures, molds, terrines, pates, galantines, confits, sausages, smoked meat and fish products, salads, decorative flourishes, ice and food sculptures and cold soups and sauces. The part that inolves all the work with pork falls under charcuterie.
While chef de garde manger is now often referred to as an entry-level cooking position – it involves the salad station and small plate prep, requiring limited experience – a true garde manger is a highly-skilled chef in a specialty with gravitas. This profession dates back to pre-revolutionary France and is considered seriously old-school. In high-end kitchens, this is the position responsible for numerous classical dishes and presentations.
Garde manger has evolved over the years to accommodate changing tastes, eating patterns and lifestyles. I think most cooking school graduates will make one chaud froid for every 10,000 sides of smoked salmon they produce during their careers – unless they’re banquet chefs!
While certain things that fall under this genre are best learned in a formal cooking class, there are some that are quite easy to make at home – but most people don’t know that.
Today I want to pass along to you my simplified recipe for gravlax, aka gravad lax, which is dill-scented cured salmon served with a mustard sauce. Often an appetizer, it’s great as a full summer meal served with crispbread, like Wasa, and a big salad.
Gravlax is akin to lox, which is cold-smoked, in its silky smoothness and rich mouthfeel. It looks like lox and is sliced thinly in the same manner. Gravlax is not exposed to any heat, however, rather just cured in a salt and sugar mix.
It’s expensive and not that easy to find. If you want to have it out, go to Ikea. Buy a whole package of their crispbread before you go into the cafeteria, then get several gravlax plates. You can feed 3 or 4 people gravlax this way for under $20. This is a serious bargain. I tell you to get the package of crispbread in advance so you don’t have to pay the per-piece price for extra in the cafeteria – which, at something like 35 cents per piece, is the only insanely-priced item in the whole store!
No need to have it out, though. You can make it at home a couple of days before you need it.
If you want to use my traditional gravlax method, look here, but I needed to find a way to minimize the amount of refrigerator real estate I used to prep this, having been downsized from a double-wide unit recently. Long story involving a lemon of an LG that my appliance store, Galvin, took back after two years. It looked nice, had a bottom freezer and French doors, but the ice maker was wreaking havoc. In exchange, I got a GE with a side freezer. The ice maker on this one is a problem, too. Don’t even get me started with ice makers. I never had one. Never wanted one. Was convinced to get one. Had nothing but problems since then. Ice is all over my freezer – again. I get ice and frost on the floor when I pull out the ice bin. Why? It does not stop making ice. Ever.
Back to the fish.
A few key pieces of information:
1). Buy fatty salmon. Your gravlax will not work with salmon that is lean. You have been warned. If you can’t get wild, fatty, king/chinook salmon, buy a sustainably farmed version – of some kind of fatty salmon. Keta salmon, which is all over the Bay Area as I write this, is too lean. Steelhead salmons – which are actually sea-faring rainbow trout, believe it or not (or, I should say, rainbow trout are salmon that never leave home) – have a medium fat content and are OK.
2). Buy a boneless side of salmon with the skin. Or a piece of a boneless side with the skin. Ask your fishmonger if the pin bones have been removed. If not, ask that they be removed. If you need to remove them, look here.
3). Buy good fish from a market like Monterey Fish – or Berkeley Bowl’s fish counter. The fish will be fresh, and these people care about sustainability. Do not buy crappy salmon from a supermarket in a package with all kinds of goo. You know exactly what I mean.
4). Work clean. You should always do this, but take extra care when you cure or preserve something.
Honestly, gravlax alone justifies my two years of culinary school given how often I make it.
Gravlax with Mustard-Dill Sauce
1 side of salmon with high (or at least medium) fat content with no pin bones (see above)
1 lemon (a fresh lemon!!!)
1 ounce plain vodka, gin or aquavit
1/2 cup Kosher salt
1/2 cup raw sugar
2 tablespoons ground black pepper
1 large bunch of dill, washed and absolutely dry. It must be dry!! Reserve a small piece of dill for sauce.
Aluminum foil
Paper towels
2 pastry brushes
1). Make cure mix. Whisk together salt, sugar and pepper. Set aside.
2). On counter, lay out a double thickness of foil that is about 6 inches longer than your side of salmon.
3). Fold about 6 paper towels in half and create a bed that is about the size of the salmon.
4). Lay side of salmon, skin side down, on the paper towel bed.
5). Squeeze the lemon over the flesh, and then brush it onto the entire surface.
6). Brush the booze onto the entire surface with the other brush.
7). Sprinkle the cure mix over the fish, making sure you cover the entire flesh, applying it more thickly to thicker parts. Don’t touch or rub it in. Use all the mix.
8). Cut a couple of inches of stem off the dill and arrange the rest on top of the cure mix without disturbing it.
9). Fold ends of foil over, then sides. Cover the top with another large piece of foil. You want to wind up with a rectangular foil-covered package. Keep fish perfectly flat at all times and do not bend fish!!!
10). Lay fish packet flat in back of fridge on a few paper towels or another piece of foil – just in case there is a little seepage. Sometimes there is, sometimes there isn’t.
11). Allow to cure for two days. Three days is OK if you have a very thick fillet.
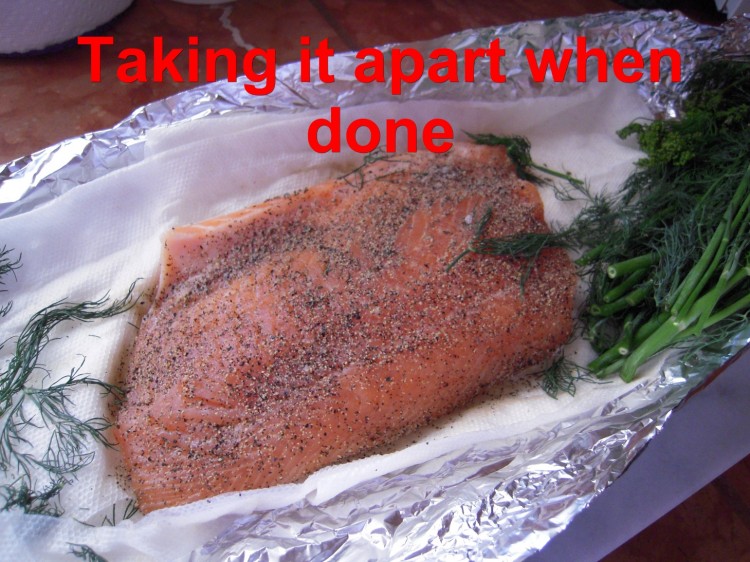
12). Remove from fridge, open packet and move fillet to a cutting board that has a couple of paper towels on it. Discard dill. If cure does not come off easily, it’s OK to quickly rinse fish under cold water and then gently pat dry, bottom and top.
13. Using a clean cutting board and a sharp, thin knife, cut long, thin slices, holding knife almost parallel to the fish. See photo. This takes some practice, but you’ll get the hang of it. I use a serrated knife – even though a serrated knife is generally not the tool for this job, but it works very well because it’s so thin and holds a razor-sharp edge. A slicer, if you have one, may be your best bet. A good boning knife, too. Depends upon you and the knife.
14. Arrange slices in lovely circular pattern and serve with a cup of cold mustard-dill sauce in the center.
Mustard-Dill Sauce
Whisk 1/2 cup Dijon mustard, 1/2 cup good honey, a little chopped dill (remember that you were supposed to save a little?), and a couple dashes of sea salt and ground white pepper. Allow to sit in fridge for a couple of hours so flavors meld. Note that there’s no dill in the sauce in the photo because someone threw out my reserved dill.