Tag Archives: american cuisine

Stuffed Savory ‘shrooms

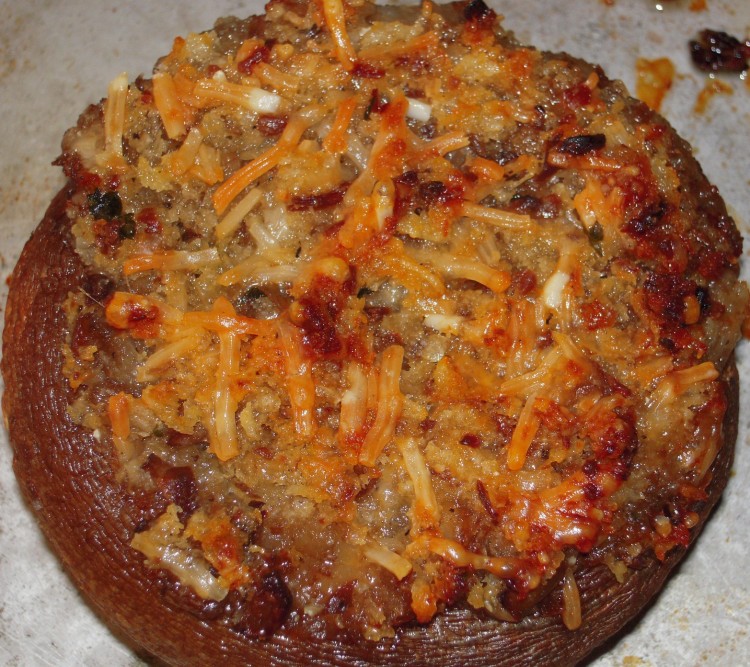
Large stuffed mushroom

The way I figure it, stuffed mushrooms need a MacGuffin.

If you remember your Hitchcock, a MacGuffin is a device in a fictional work that drives the plot and hooks viewers.

Without a distinctive element, a stuffed ‘shroom is just so much breadcrumbs and cheese, and many of them taste the same because they all have basically the same kind of stuffing.

What I set out to do was create a version that was familiar and comforting, but had a little more impact.

Stuffing for mushrooms on stove

First, I wanted to really bring out the umami* in the mushrooms.  Next, I had to be able to use the stems for frugality’s sake.  Finally, there would have to be an ingredient that would separate my version from the pack. 

Mincing and browning mushroom stems and adding anchovy paste and a nice dose of vermouth resulted in a savory, substantial stuffing with a little kick.  If you think of what vermouth does to risotto, you’re on the right track.

These come out of the oven nicely brown, too.

I suggest you use the large mushrooms called for in the recipe because they’re easy to deal with and work well on a dinner plate in place of a protein.  They look big, meaty and inviting.  Berkeley Bowl almost always has them.

Stuffed mushrooms ready to go into oven 

Savory Stuffed Mushrooms
   Makes enough for 5 as a main dish served with sides, 10 as an appetizer10 extra-large (huge,            really) white mushrooms
2 tablespoons butter
3 tablespoons olive oil
2 teaspoons chopped shallots
2 teaspoons chopped garlic
1/2 teaspoon black pepper
1/2 teaspoon ground marjoram
2 teaspoons dried parsley
1 teaspoon anchovy paste (or 1 anchovy fillet that has been mashed to a pulp with a fork)
Scant 1/4 cup dry vermouth
1 cup panko (Japanese breadcrumbs, which are coarse and unseasoned)
3/4 cup shredded Parmesan cheese
Olive oil for brushing

1).  Prepare mushrooms by wiping well or washing and drying.  Make sure they are very dry!  Pull out stems carefully and set aside.  Lightly grease a sheet pan and arrange caps bottom side up.
2).  Mince the stems finely.  Do this with a food processor unless you have the patience to arrive at a very fine mince by hand.  I use a Kuhn-Rikon “Twist & Chop.”  Set aside all but 1/4 cup.
3).  Saute the 1/4 cup minced stems in the olive oil in a small but heavy saucepan until golden brown.
4).  Take the pan off the heat and allow it to cool for a couple of minutes.
5).  Place butter, shallots, garlic, pepper, marjoram and parsley in saucepan with browned stems and saute over low heat until butter is melted.
6).  Cover and cook for about a minute.  You want to sweat this mixture and not brown it.
7).  Mix in anchovy paste and cook for a few seconds.
8).  Mix in remaining stems, cover and cook over low heat until mushrooms are cooked through – about 2 minutes.
9).  Stir in vermouth and cook for about a minute, uncovered.
10). Remove from heat and mix in panko.
11). Transfer mixture to a bowl and allow to cool for about 20 minutes.
12). Fold cheese into stuffing until well incorporated.
13). Stuff mushroom caps, pressing filling in well.  Do this with all of them and then distribute the excess evenly to overstuff slightly.
14). Brush olive oil on stuffed mushrooms, being sure to get oil on the mushrooms, not just the stuffing.
15). Bake at 375 deg F. until they are brown on the outside and hot throughout.  Use convection, if you have it, but keep an eye on them so they don’t burn.  Will be something like 20 – 25 minutes.
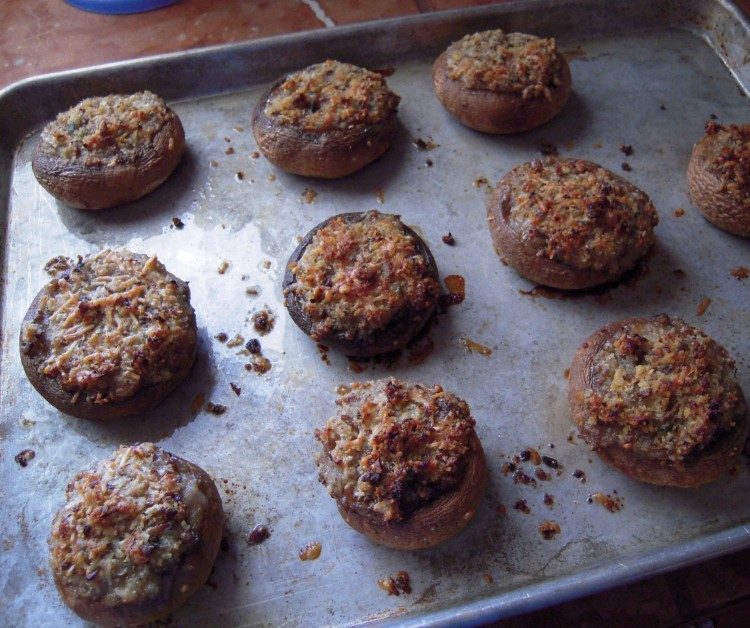
stuffed mushrooms just out of the oven

*Umami is a fifth taste (savory), occurs naturally in certain foods, and has to do, roughly, with glutamates.  This is complicated, so you should do a little research for the full story

The wonders of duck fat

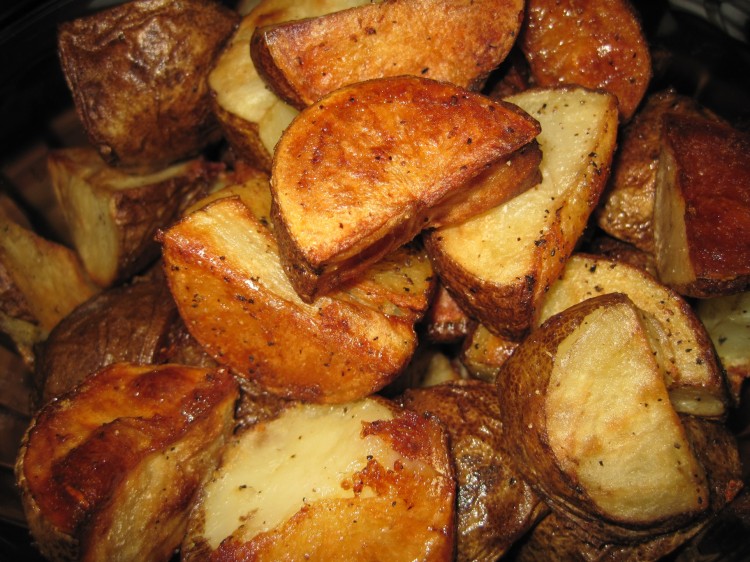
duck fat potatoes 2010

Being of German extraction, I think you should always have a bag of potatoes in the house.

Whatever else you may or may not have on hand, with potatoes and oil you can make a meal:  roast potatoes.

If you have eggs, you can add a couple on top – over easy.  Throw in toast and you’re living large.

With a container of rendered duck fat, however, you can produce the most fabulous roast potatoes of your life.

Now you know why I serve duck for Easter.  Not only are roast ducks delicious, but I wind up with a couple of cups of fat that I can use over the next 6 months.

While I don’t use a traditional rendering method, it works just fine for me, so I thought I’d pass it along.

It’s easy.  Go to 99 Ranch Market or your supermarket and buy a duck.  You’ll probably get a Pekin, which is the most common meat duck in the US.  When I was growing up they were called “Long Island” ducks.  Apparently a number of them were exported from China in 1873, with several winding up in New York’s Suffolk County.  This part of Long Island then became a major duck farming area.

You might see Musovy ducks – stronger tasting and leaner – or the Pekin-Muscovy hybrid, Moulard.  Since you’re not making confit (in which case the Moulard would be your pick), and you want lots of fat, I’d go with the Pekin.

Rub with salt and roast on a rack at 350 deg. F until the internal temperature reads 165.  A broiling pan works well for this – the kind you get when you buy a range.  Some cookbooks tell you not to rub ducks with salt prior to roasting, but this is crazy to me.  I want crispy skin and don’t care if there is salt in the rendered fat.  If you have convection, use it.  This is not a good time to use wine or apples or any of that other stuff because you don’t want to flavor the fat.  When you move the duck from the rack to a serving dish or board, don’t allow all the juices run out of the opening into the roasting pan.

OK, so now you have a duck for four that you can serve with braised red cabbage and whatever else you want.

You should have a nice amount of fat with some drippings in your roasting pan.  Try to leave drippings in the pan, to the extent possible, in the next step.  When just comfortable to handle, carefully pour fat through a fine-meshed sieve into a large glass measuring cup, or something like it, and leave on your counter until the fat has risen to the top of any drippings.  At that point you can just pour (or almost pour – the melting point of duck fat is 76.5 F) the fat into a food-safe plastic container, being sure not to pour any of the drippings out.  This is very important because they will reduce the shelf-life of the fat considerably!  Wrap the container in plastic and store in the back of your fridge.

Drippings scraped from the pan and those remaining in your measuring cup can be stored in a small container for use in the next few days.  I don’t bother separating out that last little bit of fat, and simply make a big batch of roast potatoes with this mix of fat and gelee, or use the latter in a pan sauce.  I try hard not to waste anything on an animal.

rendered duck fat 2010

If you want to make roast potatoes, just substitute all, or half, of your canola or olive oil with duck fat.

Duck fat tastes so good you’d think it was terrible for you.  On the contrary, it’s high in monounsaturates and has good things going for it in the way olive oil does.

Before I jot down my roast potatoes recipe, I want to give a nod to Pear Street Bistro in Pinole.  A couple of years ago I had an appetizer there that involved crispy roast potatoes covered with melted Gruyere and a side of short rib gravy.  Since that time I’ve stretched many a meal out of leftover braising sauce, melted cheese and roast potatoes!

Crispy Roasted Duck Fat Potatoes

4 extra-large Russet potatoes, washed/scrubbed, dried and cut into large pieces (1-1/2″- 2″)
1/4 cup rendered duck fat, give or take, dep. upon potato size
Kosher salt
Freshly-ground pepper

1).  Place potatoes on a large sheet pan*
2).  Add the duck fat and salt to your liking
3).  With your hands, rub fat, salt and potatoes together so potatoes are coated
4).  Bake at 400 deg. F (convection, if you have it, but keep an eye on things to prevent burning) for about 40 minutes, or until you see some serious browning action
5).  Take out and turn potatoes.  Use a spatula with a sharp edge and scrape/pry under potatoes so you don’t leave crusts on the pan.  Some will stick, some won’t.  If they are too dry, you can add a little olive oil, making sure there is oil where taters make contact with the pan
6).  Continue to roast until very brown on all sides.  I tend to overcook them a bit so they’re very crisp on the outside and buttery soft inside
7).  Remove from pan carefully with said spatula and sprinkle with a little ground pepper

*You should have at least one really big sheet pan!  For most of us this will be 15″ X 21″ – AKA 3/4 sheet pan, based on commercial sizes.

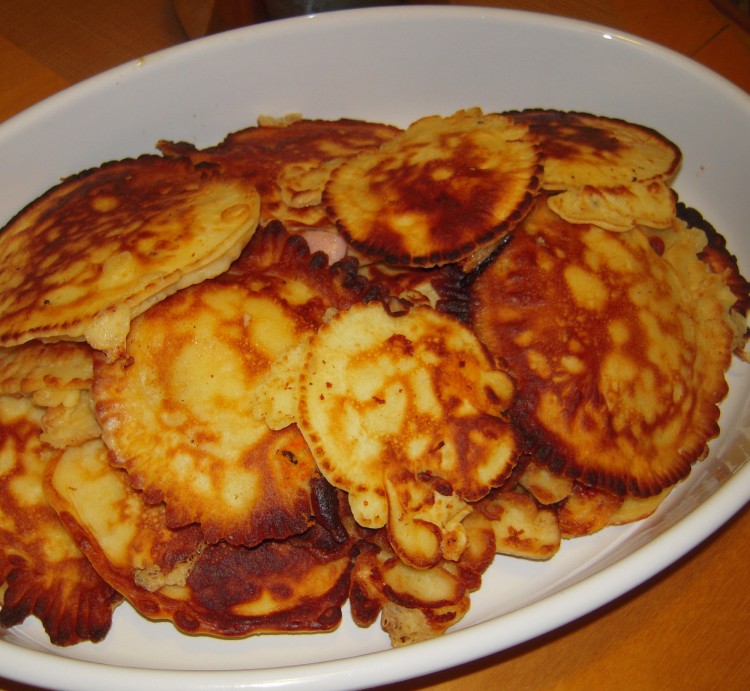
Ham & cheese pancakes for dinner

Hame & cheese pancakes

Han & Cheese Pancakes

When Steve and I were in Amsterdam, we had savory pancakes at a place near the Anne Frank House on the Prinsengracht.  Since that time, I’ve made my own version at home.  I even served them in cooking school as a lunch special, and they were a big hit, being something a little different but highly comforting.

We are not pancake and waffle people, and nothing is worse to me than all those plates you see these days piled high with pancakes, whipped cream, chocolate chips, fruit sauces, nuts and whatever else they load on there.  When I have a pancake I want it with a little butter and real maple syrup, or savory, as I’m covering in this post.

For a basic ham and cheese pancake you need a decent pancake batter.  Any plain version will do, but make sure it’s not sweet.  Feel free to use my recipe, which I’ll provide.

I usually make my pancake batter by feel.  I always have a batch of the dry part of the recipe on hand – like a home-made version of packaged baking mix, but better, because it doesn’t have any garbage, like anti-clumping agents or trans fat – and then I add the liquids of my choice.

To make the dry mix, whisk together:  6 cups all-pupose flour; 7-1/2 teaspoons baking powder; 3 teaspoons salt; 3 tablespoons white sugar.  Make sure you check the expiration date on the baking powder.  Store this in an air-tight container, and make only what you’ll use up in 4 months.

You can make all kinds of pancakes using this dry mix.  My basic pancake is more like a thick crepe, so I tend to produce an eggy batter for that.  I may use buttermilk or yogurt in place of the milk.  It depends what I feel like, but the bottom line is that I use a blend of milk, eggs, fat and the dry mix.

For the savory pancake batter, I use:  1 egg, 1/8 cup of Canola oil and 3/4 cup of milk for every cup of dry mix.  Whisk the egg, oil and milk, and then whisk in the dry mix until you get rid of most of the lumps.  If you want it runnier, add more milk.  Dryer, add more mix.*

Note:  Serve all pancakes, including these, with a little real maple syrup.  Please!  Don’t use the stuff that’s nothing but sugar and high fructose corn syrup, which is most of what’s out there.  Real maple syrup is worth the money.  Finally, please don’t drown good pancakes in syrup.  If you’re doing this there must be something wrong with the pancakes.

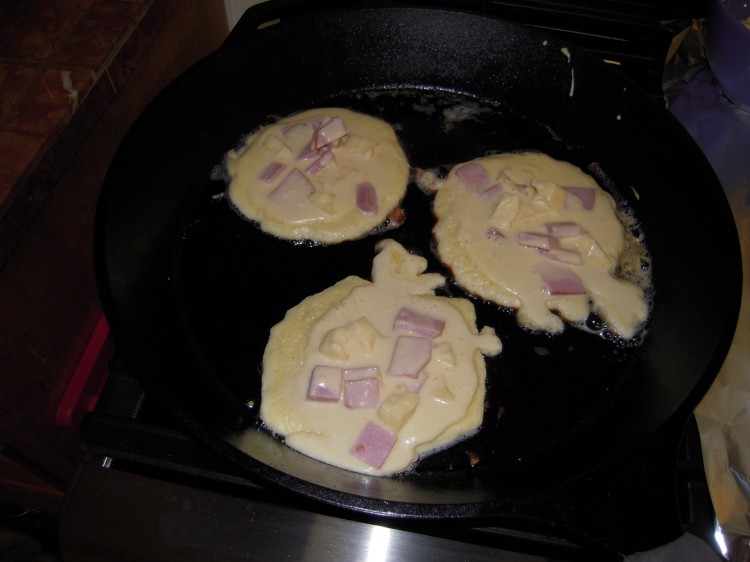
What they should look like after you ladle on the extra batter

What they should look like after you ladle on the extra batter

Ham & Cheese Pancakes
     Serves 2 – 3, or my husband, Steve

*1 batch pancake batter, as indicated above, or equivalent
1 cup sharp Cheddar cheese, in small cubes (more, if you want)
1 cup good cooked ham, in small cubes  (more, if you want)
Canola oil for frying
Cast iron or other heavy pan or stove top griddle (this is important; don’t use a thin pan because the pancakes will burn)
If you are not going to serve them right out of the pan, which is what you should do because they are best this way, you’ll need:
Large, oven-proof dish to hold pancakes
Oven heated to 200 deg. F.

1).  Heat a decent amount of Canola oil in pan over medium heat; turn heat down slightly when oil is hot.  Check heat throughout cooking process.
2).  Ladle batter into pan so you wind up with something like 5-inch pancakes.  Bigger or smaller is OK, too.
3).  Immediately sprinkle some cheese on top of each pancake, and then some ham.
4).  Drizzle a little batter over the ham and cheese – not too much.
5).  When you see bubbles on the surface of the pancakes, turn each over quickly.  The cheese will really melt now and some will ooze out and go crispy in the pan, which is a good thing, but don’t let anything burn.
6).  When pancakes are cooked through, which will not take very long, remove to oven-proof dish and place in oven.
7).  Repeat until you’ve used up your batter.
8).  Serve will a little real maple syrup on the side.

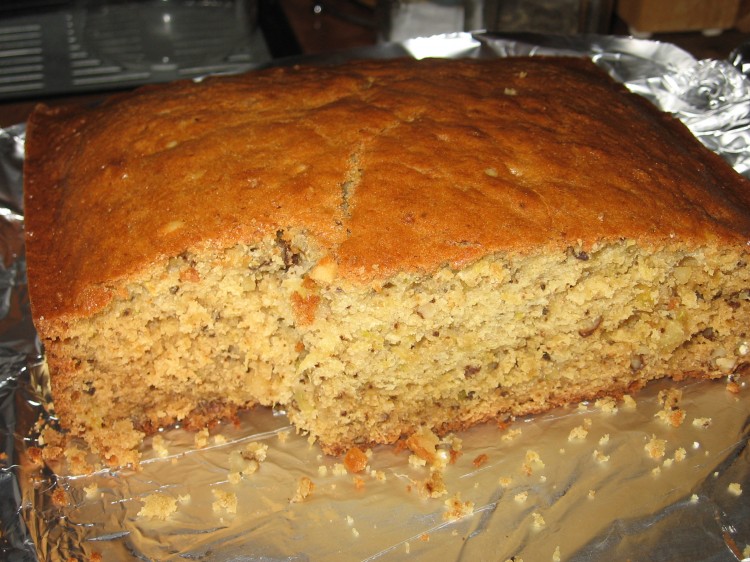
Zucchini bread

Zucchini bread (baked in an oblong pan instead of loaf pans)

I wanted to be sure to post my zucchini bread recipe during the holidays – so here it is.  This was given to me when I was a teen by Martha Yanavitch, a close friend and neighbor from my Stevensville, PA days.  There is so much good food in that area!

Quick bread is a wonderful thing in that it is easy to make and fairly fool-proof.  With this recipe you can’t go wrong, and it would make a nice gift or dessert at a holiday party.  Great also with a cup of coffee before work.

Pineapple Walnut Zucchini Bread
3 eggs
2 cups sugar
2 tsp vanilla
1 cup canola oil
2 cups grated raw zucchini
3 ½ cups flour
1 ½ tsp salt
1 ½ tsp baking soda
¾ tsp baking powder
1 cup crushed pineapple
1 cup chopped nuts (walnuts or pecans work well)

1)  Mix eggs, sugar, vanilla, oil and zucchini
2)  Mix in dry ingredients
3) 
Mix in pineapple and nuts
4)  Bake in loaf pans (recipe makes two loaves) at 350 F. for one hour or until done

Ginger’s white no-bake cookies

Ginger’s white no-bake bar cookies

When I was in high school in Northeastern Pennsylvania, the cafeteria staff had to make use of the large quantities of peanut butter received from government food programs.  They often served a no-bake bar cookie loaded with PB and quick oats – which I developed a fondness for but never saw outside of that area before or since.  In recent months I thought I’d try to make this cookie, but the recipe I procured from a friend was for the chocolate version, which turned out OK but did not tickle that particular taste memory for me.  I contacted a high school friend, Ginger, via Facebook, who I figured could come up with something for me.  She told me she developed a white version of this cookie with marshmallow creme added that resulted in something akin to fudge, and that it had been a big hit with her family.

I made a big batch of these cookies two weeks ago and they disappeared fast.  If you try the recipe, one suggestion is to wait a day before you serve them so that they firm up and meld a bit.  That said, I think my husband and son ate about a third of them the first day, so good luck with the waiting.

I have to say that I find it interesting that all the kids who were nice in high school became nice adults, and the ones who were interested in cooking as teens still cook today.  Case in point:  Ginger and I were in Home Economics together (do they still teach this anywhere?) making things like chocolate fondue (that was the 70’s) and now she and I are both in the food business.

Ginger’s White No-bake Bar Cookies

1 cup margarine (use one of those “bad” margarines – not something like Smart Balance; butter works, too)
2 cups white sugar
1 cup packed brown sugar
1/2 cup whole milk
5 cups quick oats
1/2 cup smooth peanut butter
1 cup marshmallow creme
1 teaspoon vanilla

1)  Combine margarine, sugars and milk and bring to a hard boil; allow to boil for two minutes, stirring gently with a heatproof spatula.  Note that the hard boil is important, because it is raising the temperature of the sugars so that the cookies set properly.
2)  Remove from heat
3)  Add peanut butter, marshmallow creme and vanilla, stirring till mostly melted
4)  Stir in oats until all are coated
5)  Spread out evenly in a wax-paper lined 9′ X 13″ oblong cake pan (or one that is nonstick with a bit of oil spray)
6)  Allow to cool on counter for 15 mins and then transfer to refrigerator to cool for two hours
7)  Turn out onto counter (carefully!) and cut into bars.  I use a bench scraper or wide spackling tool for this

These no-bake cookies look like a marble tile when they come out of the sheet pan