Tag Archives: vegetables

The CSA Experience: Part 2

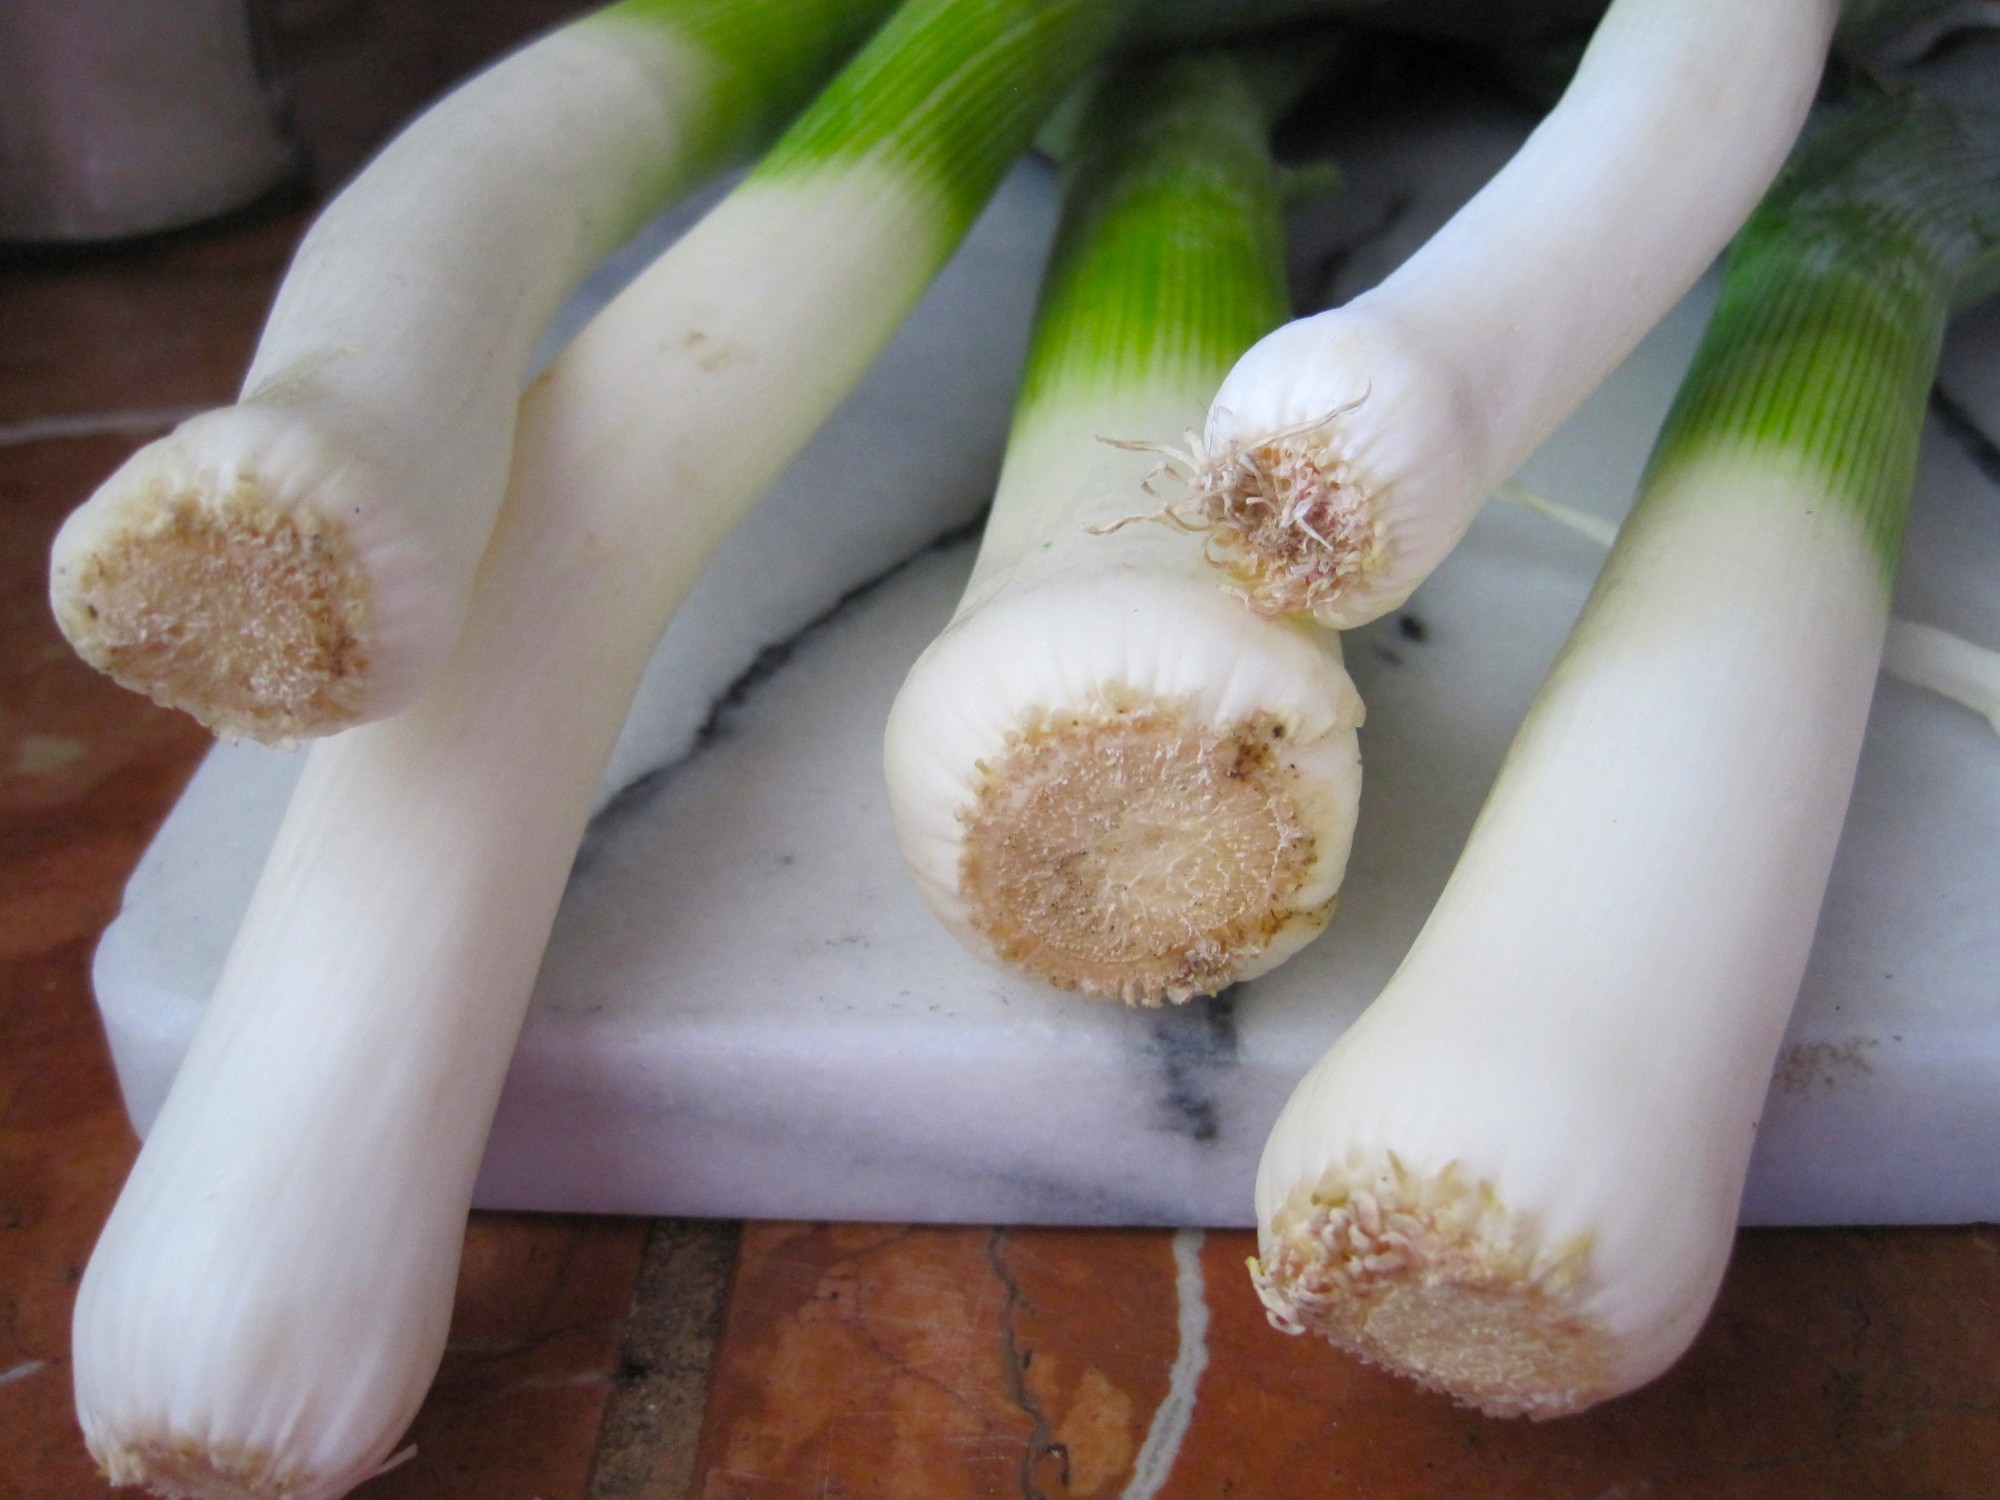
These are the leeks that came with my CSA box last week

The first installment of my CSA series covered quite a bit of ground about what the CSA concept is all about, and a bit about the company I chose for my own home-delivered organic produce:  Albert & Eve.

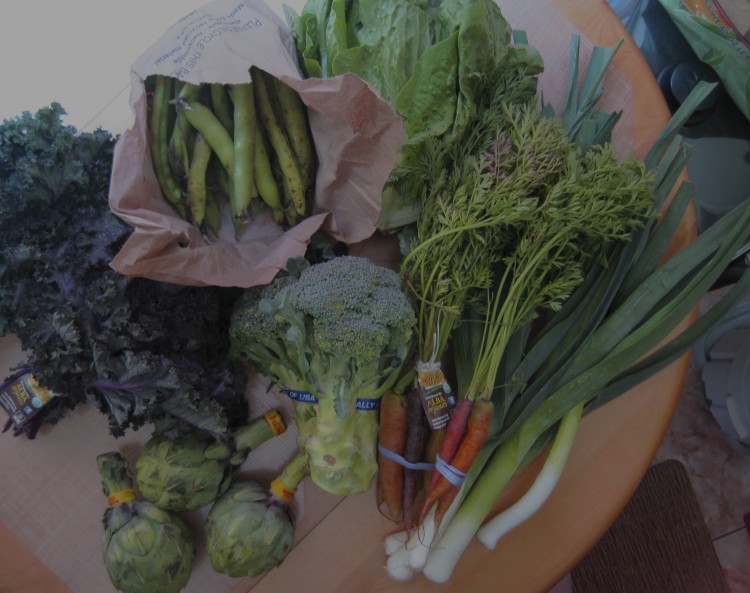
Let me now tell you what and how much was in my first box, which arrived last Thursday. There’s a photo of the contents here.

1 huge romaine lettuce
2 bunches of rainbow carrots
1 large broccoli
5 massive leeks — so long I had trouble fitting them in the fridge
2 bunches red bohr kale
1 bag fresh fava beans (about 15)
3 medium artichokes

It all came in minimal packaging: a paper bag with the odd inner bag or two, one plastic.
Everything was fresh as can be and looked and smelled great.

Now, here’s where you have to plan a little based on shelf life.  Artichokes and broccoli can hang around for a good week.  The lettuce was already slated for a family-sized Mexican entree salad for that same night — and a lunch salad the next day for my son — so I had to think about leeks, kale, carrots and favas.

The favas and carrots were in quantities fit for one side or one snack each for the four of us. The kale could make a meal if I used both bunches, or two sides, if I used one at a time. The tremendous leeks would serve as the base for two meals:  one using the tender parts, another using the tougher end greens.

First up on the chopping block:  leeks.  If you haven’t hung with many leeks in your life, they’re related to onions and garlic, but are much milder.  They look like really big scallions.  Only the white and light green parts are eaten and the rest is used for stock.

They’re popular in the UK — especially Wales, and often show up in soups.

I decided on a leek and feta scramble.  With preserved lemon, which I always have in spades because my lemon trees are good to me.

A little sumac, too.  Sumac is a tart spice made from dried berries — very popular in the Middle East.  It’s generally sprinkled on top of finished dishes.

Feta, sumac and preserved lemon on wooden board

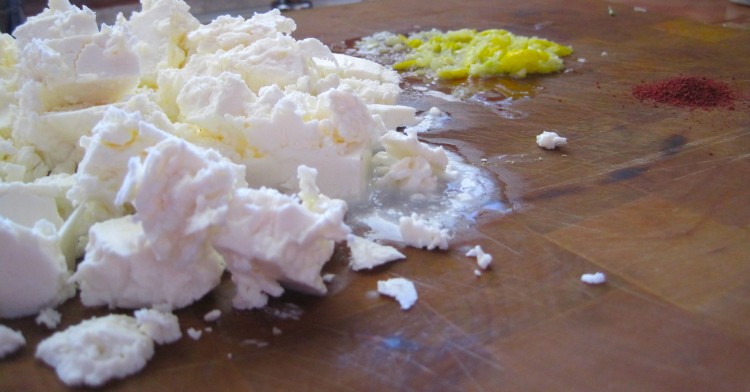
Feta shards, sumac and chopped preserved lemon for the scramble

A recipe accompanies this post, but the idea is to chop the tender part of the leeks, saute until soft, add whisked eggs and cook so that you have large, soft curds, adding the feta and seasonings at various stages.

Please purchase blocks of sheep’s milk, or sheep’s/goat’s milk feta — in brine, if you can — and not the cheap, tasteless, pre-crumbled stuff so popular these days.  Good feta should be salty and tangy with real mouthfeel.  If you buy fat-free feta, well, you’re going to be sorry.  When dishes have only a few ingredients, you need them to be the best they can be. Just sayin’ — don’t mean to be preachy, but better to have a little real feta in there rather than lots of the cardboard kind.

Pastured eggs would be a good choice here, too.  They taste like eggs used to taste, because the hens producing them roam around and eat bugs and worms and whatever else they like to peck at in addition to their feed.  If you can’t afford them for general use, spring for them when you’re making a scramble or some fried eggs.  You’ll really enjoy the taste of their deep yellow yolks.

Leeks cut in half

OK, leek prep.

Once you trim and liberate the tender from the tough, as in the photo above, store the latter back in the crisper.

Then clean the leeks by cutting them lengthwise all the way through from about a half-inch from the bottom.  Then make a similar cut between your original cut, which will ribbon the leaks, allowing you to clean nooks and crannies as you flagellate them in a sink full of water.

Then you can dry them off and chop away.

leeks being chopped

Then saute slowly until soft.

sauteed leeks

Then add everything else in stages.  I sometimes add the cheese along with the seasonings, as I did here, but generally I add it as indicated in the recipe — right at the end.  This time around the cheese was on the dry side, so no worries about it releasing too much brine during extended cooking.

Leek and feta scramble in frying panWe were so happy about the soft, mildly-oniony scramble that I neglected to photograph the finished product — which we consumed with a side of good toasted bread, which is all you need.  The addition of the sumac and lemon added a whisper of citrusy tartness to the salty, creamy, funky feta backbone.

Trust me, it looked good, too.

Tune in next time for favas.

Leek, Feta & Preserved Lemon Scramble
 
Prep time
Cook time
Total time
 
Soft scrambled eggs with leek, feta, preserved lemon and sumac.
Author:
Recipe type: Brunch
Serves: 5
Ingredients
  • 4 to 5 leeks, chopped (the white and very pale green parts only)
  • 2 tablespoons canola oil, or more, if your leeks are large
  • 2 tablespoons butter, or more, if your leeks are large
  • 10 eggs
  • ½ pound feta cheese, broken into medium shards
  • 2 tablespoons preserved lemon, finely chopped (If you can't find jarred Morrocan preserved lemon, just chop a quarter of a lemon finely, mix with a ½ teaspoon of kosher salt, and store in fridge overnight)
  • ½ teaspoon sumac
  • Kosher salt
  • Ground black pepper
Method
  1. Add canola oil and butter to a large, heavy skillet over medium flame
  2. When hot, add leeks and turn flame down to low
  3. Add a little salt
  4. Saute leeks until nice and soft
  5. Whisk eggs with a little water (water will help soften them), the lemon and the ground pepper
  6. Add egg mixture to pan over leeks
  7. At short intervals, pull eggs from the bottom of the pan with a spatula to form large curds
  8. When eggs are still quite runny, gently mix in feta
  9. Keep pulling up the eggs gently until the feta is very soft
  10. Remove scramble to serving platter and sprinkle with sumac
  11. Serve with good toasted bread

The CSA Experience: Part 1

First Essential Organic Veg box from Albert & Eve

First Essential Organic Veg box from Albert & Eve

I finally bit the bullet and ordered a semi-weekly home-delivered organic produce box.  AKA a “CSA box,” with the CSA referring to community-supported, or community-shared, agriculture.

Not only will this encourage the fam to eat more veggies, it will almost ensure that we do.  No way I’m going to throw food out.

It will also serve as the muse for a multi-part series here, which may be helpful to readers who want real life information about CSAs before taking the plunge.

Choosing a first CSA in the SF Bay Area is no easy task.  Ask 20 people, get 20 opinions. Look on the Web, get another 20,000.

I went with Albert & Eve.  After considerable research.  They have a loyal client base and support local, small-scale farms.  They also offer home delivery.  Not all CSA entities do.  With some you have to select a local pick-up point.

I just want stuff to show up on my porch — no car, no parking, no schlepping.

How does a CSA actually work?

I’ll get to the nitty-gritty of CSAs as I write this series but, in a nutshell, one can subscribe to single-farm CSAs or co-ops, or get their produce from a middleman-type organization, which either partners with farms or purchases fruit and veg outright for distribution to subscribers.  There are numerous types of arrangements.

I was looking for a small operation offering local organic produce (we’ll get into what “local” means in the next installment, but know that this term can be a slippery-slope) with  solid agricultural values.  Albert & Eve fits the bill.  The company (it’s not a farm, but a distributor, though the term doesn’t do justice) partners with Agricultural & Land Based Association (ALBA), really does source locally, and offers eggs and a few other select goodies.

They also allow you to choose what you want from among what they believe they will have available.  Because this is seasonal eating, it doesn’t mean you can ask for peaches instead of apples in January, but it does mean you can tell them “enough, already!” with the leeks and to send you more fennel instead.  Provided they have it.  Again, this is not stuff cranked out in a factory.  You have to be flexible.

There are some huge, corporate-type CSAs around here.  I didn’t want that.  I like the personal touch.  I want to know the people behind the operation.  I want to count to them.

Organics and cost

Now, organic produce ain’t cheap no matter how you buy it.  A CSA subscription, however, allows you to get the freshest local organic produce delivered to your door — or a drop-off point — at a very reasonable price.  Depending upon the CSA, you’re looking at about $20 to $35 per box in the SF Bay Area, which provides 3 or 4 people with vegetables and fruit for a week.  If you take just veggies, as I have, you’ll be able to throw in a couple vegetable main courses along with sides.

I’m paying $33.20 per box, which arrives in a paper bag, in fact, so there is no dealing with boxes.  The price includes the cost of their Essential Organic Veg Box, and the surcharge for feeding more people, which means they give you extra of each item.  The box officially contains 6 types of vegetables, but I got 7 this time.

Many CSAs offer small and large boxes, so you can choose based on your needs.  Some offer more flexibility that others.  Do your research.

If you buy cheap conventional produce at Safeway, CSA subscription prices may bring on sticker-shock.  Perhaps you’ll realize, by and by, that it’s worth the extra. Organic produce involves no chemicals or synthetics.  It’s not genetically modified. Sure there are studies claiming that conventional produce is “just as safe” as organic.  For me, though,  it’s about common sense.  If you offer me an artichoke from a plant treated with Supracide 25 WP, and one from an organically-grown plant, I’ll take the one without the chemicals, please.  Wouldn’t you?

Tips and things to think about if you go CSA

Make sure you have a salad spinner on stand-by.  A good one.  Why?  Now and then the leafy greens that arrive may contain harmless critters, and the only way to get them off is a good bath.  That’s where the spinner comes is.  You’ll need to get the water off very well, and nothing does it better.

The other things you’ll need on stand-by are creativity and a sense of humor.

You can’t boil every turnip.  You wouldn’t steam every artichoke.  You shouldn’t bury all your kale under braised pork shoulder.  I do that now and again, but I have a pescatarian in the house, so mostly I can’t.

I’ll be developing new and interesting vegetable recipes to deal with items that might otherwise wear out their welcome — and still may, for all I know.  I guess I’ll find out how many leeks my brood can handle in one season.

In the next installment I’ll tell you all about this week’s box, pictured above, and my evil plans for it.

Mushy Peas, Please!

Mushy peas side dish in red earthenware saucepan
Mushy peas, a British standard, is overlooked here in the US.

Comforting and easy to make, the dish works well as a side to something crispy, like fish & chips (surprise!) or fried chicken.

While the authentic version is made from marrowfat peas — mature and field-dried — this one uses plain old frozen peas, offers savory oomph via chicken stock and white onion, and is easily altered to suit your liking.

You’ll be sorry if you use canned peas.  While this dish is no misnomer, you’ll want some texture.

Mushy Peas
2 pounds frozen peas (not the little fancy ones)
1 cup chicken stock
1/2 cup roughly chopped white onion, rinsed (this removes some of the sharpness)
1 tablespoon sugar
Couple dashes white pepper
1 teaspoon sea salt (depending upon saltiness of stock)
5 young mint leaves — no stems!!!
3 tablespoons unsalted butter
3 tablespoons heavy cream
1/8 teaspoon ground nutmeg (or a few fine gratings of whole nutmeg)

1).  Simmer all except butter, cream, nutmeg and mint shreds over low heat, covered, until peas are soft.
2).  Drain liquids into cup and drink later.  Why waste?
3).  Blend butter and cream into peas using an immersion blender, but leave peas reasonably chunky.
4).  Heat through over low heat, if needed.
5).  Check seasoning.
6).  Serve topped with a few mint shreds.

Note:  If you want to serve this as pea soup, leave the liquids in.  You may need to add a little more stock to thin out the soup.  See how it goes.  RPWXM2H8ZUF7

Quick Pickles

Yellow bowl of quick pickles made from English cukes

I’m sharing this simple little tip for making quick pickles because it’s been as hot as hell here in the Bay Area the last few days and I’m resorting to cool foods to help out.

This always happens.  Much of the US is cruising into fall by this time, with soups, jackets, flaming foliage and pumpkin chais running rampant.  We sit here with a string of 95 degree days.  Hate that.  I don’t care how cool the summer has been overall.  I can’t deal with extreme heat.  The resident akita-chow, Berry, has been miserable, too.

These pickle-like creatures can be made in the morning and served in the evening, and are helpful when you want something to serve with a sandwich or a curry.

Futz with the recipe as you like.  If you want them like Vietnamese cucumber salad (i.e., sweet/sour), use more sugar and only a bit of salt.

Quick Cuke Pickles

1 English cucumber, cut into large chunks – as in the photo (do not peel)
1 cup white vinegar
1 cup water
1/2 cup sugar
2 tablespoons Kosher salt
2 bay leaves
1 teaspoon crushed red pepper (optional)

1).  Place the cuke chunks in a glass or earthenware bowl.
2).  Combine remaining items in a small saucepan and bring to a rolling boil.
3).  Pour liquid over cukes.
4).  Cover with plastic wrap and allow to remain on kitchen counter for 2 hours.
5).  Transfer to fridge and allow to cool for several hours.
6).  Drain and serve.

Roasted Corn with Hazelnut Vinaigrette

Roasted corn in an earthenware bowl

There were mountains of white corn at Berkeley Bowl West the other day, so I picked up six ears.  I love that they provide receptacles near the corn for shucking then and there.  This helps me keep my green recycling pail from being a third full after one meal.

We’re a little tired of plain old corn on the cob (though we’ll be missing it like mad in about three months), so I thought I’d shear the ears, roast the kernels, and make some kind of side dish.

There is nothing like fresh corn right off the cob.  I have friends who have never taken corn off an ear – and these are food people.  Come on!  It’s easy and really worth it.

They have gizmos now that de-corn an ear in one fell swoop, but a sharp knife works fine.  I like to use my boning knife or smaller chef’s knife, and I cut about 1/2 inch off the thinner end of the cob to create a flat base.  I stand the corn on this base and then cut from the top down, hugging the ear with the side of the knife fairly tightly so I get full kernels.

Make sure you use a sharp knife.  If you feel unsure of yourself, then do this:  Buy a small scrap of untreated plywood – something like 5″ X 5″ – sand and wash it well.  Hammer a brand new, washed and dried, nail through the center of the board.  You want a thick nail that will give you about 3″ to work with once it’s all the way through the wood.  You can then jam the thicker end of each cob down onto the nail as a means of stability.  Gluing some flat silicone “feet” onto the bottom is also a good idea.  Ask for these at your hardware store.   For this recipe, just stand the thing in a sheet pan and allow the corn to fall into the pan as you cut.

Another option is using a bundt pan.  Stick the smaller end of the cob (don’t trim it) into the hole in the middle.  When you shear the ear, the kernels will fall into the pan.  I don’t use this method because I wind up cutting the bundt pan.

Note that my recipe calls for 6 ears of corn, which will crowd your sheet pan – which should technically be a half sheet pan, or half the size of a professional sheet pan.  A full sheet pan will not fit into most home ovens, but a half sheet pan is perfect, and you should have several of these on hand as they are serious workhorses.

Anyhoo, I crowd the sheet pan because I don’t want to dry out the corn.  Some of it will brown, but some of it will just cook from the heat of the corn crowding it.  You want this.  I don’t salt the corn until it’s out of the oven to prevent toughness.

Basic Roasted Corn Kernels
  Makes plenty – a half sheet pan will be full

6 ears’ worth of corn, white or yellow
1/3 cup olive oil

Version A – plain buttered
Sea salt
Black pepper
3 Tablespoons unsalted butter (take it out of fridge when you start corn)
Plastic wrap

Version B – with hazelnut vinaigrette
Sea salt
3 tablespoons roasted hazelnut or walnut oil
1/4 cup fresh orange juice (from sweet oranges – not too tart)
1 teaspoon white vinegar
1/2 teaspoon onion powder
1/4 teaspoon ground white pepper
Plastic wrap

1).  Place corn on sheet pan.
2).  Add oil, mix with hands, and spread out evenly in pan.
3).  Roast in 400 deg. F. convection oven until you see some browning action.
4).  Turn/mix corn with spatula and spread out evenly.
5).  Allow to roast for another 10 minutes or so.
6).  Remove from pan and place in large, heavy bowl.
7).  Go to version A or B.

Version A:  Season corn with sea salt and pepper.  Bury butter in the corn.  Cover with plastic wrap and allow to sit until butter melts – a few minutes.  Remove plastic, mix in butter, and serve ASAP.

Version B:  Season corn with a little sea salt and set aside.  Make a vinaigrette out of remaining ingredients (plus a couple cranks of sea salt) by whisking.  Mix vinaigrette into corn.  Cover with plastic wrap and allow to sit out on counter for 30 mins before serving.  Note that the corn will be very lightly dressed, so if you want more of the dressing just double the vinaigrette recipe.